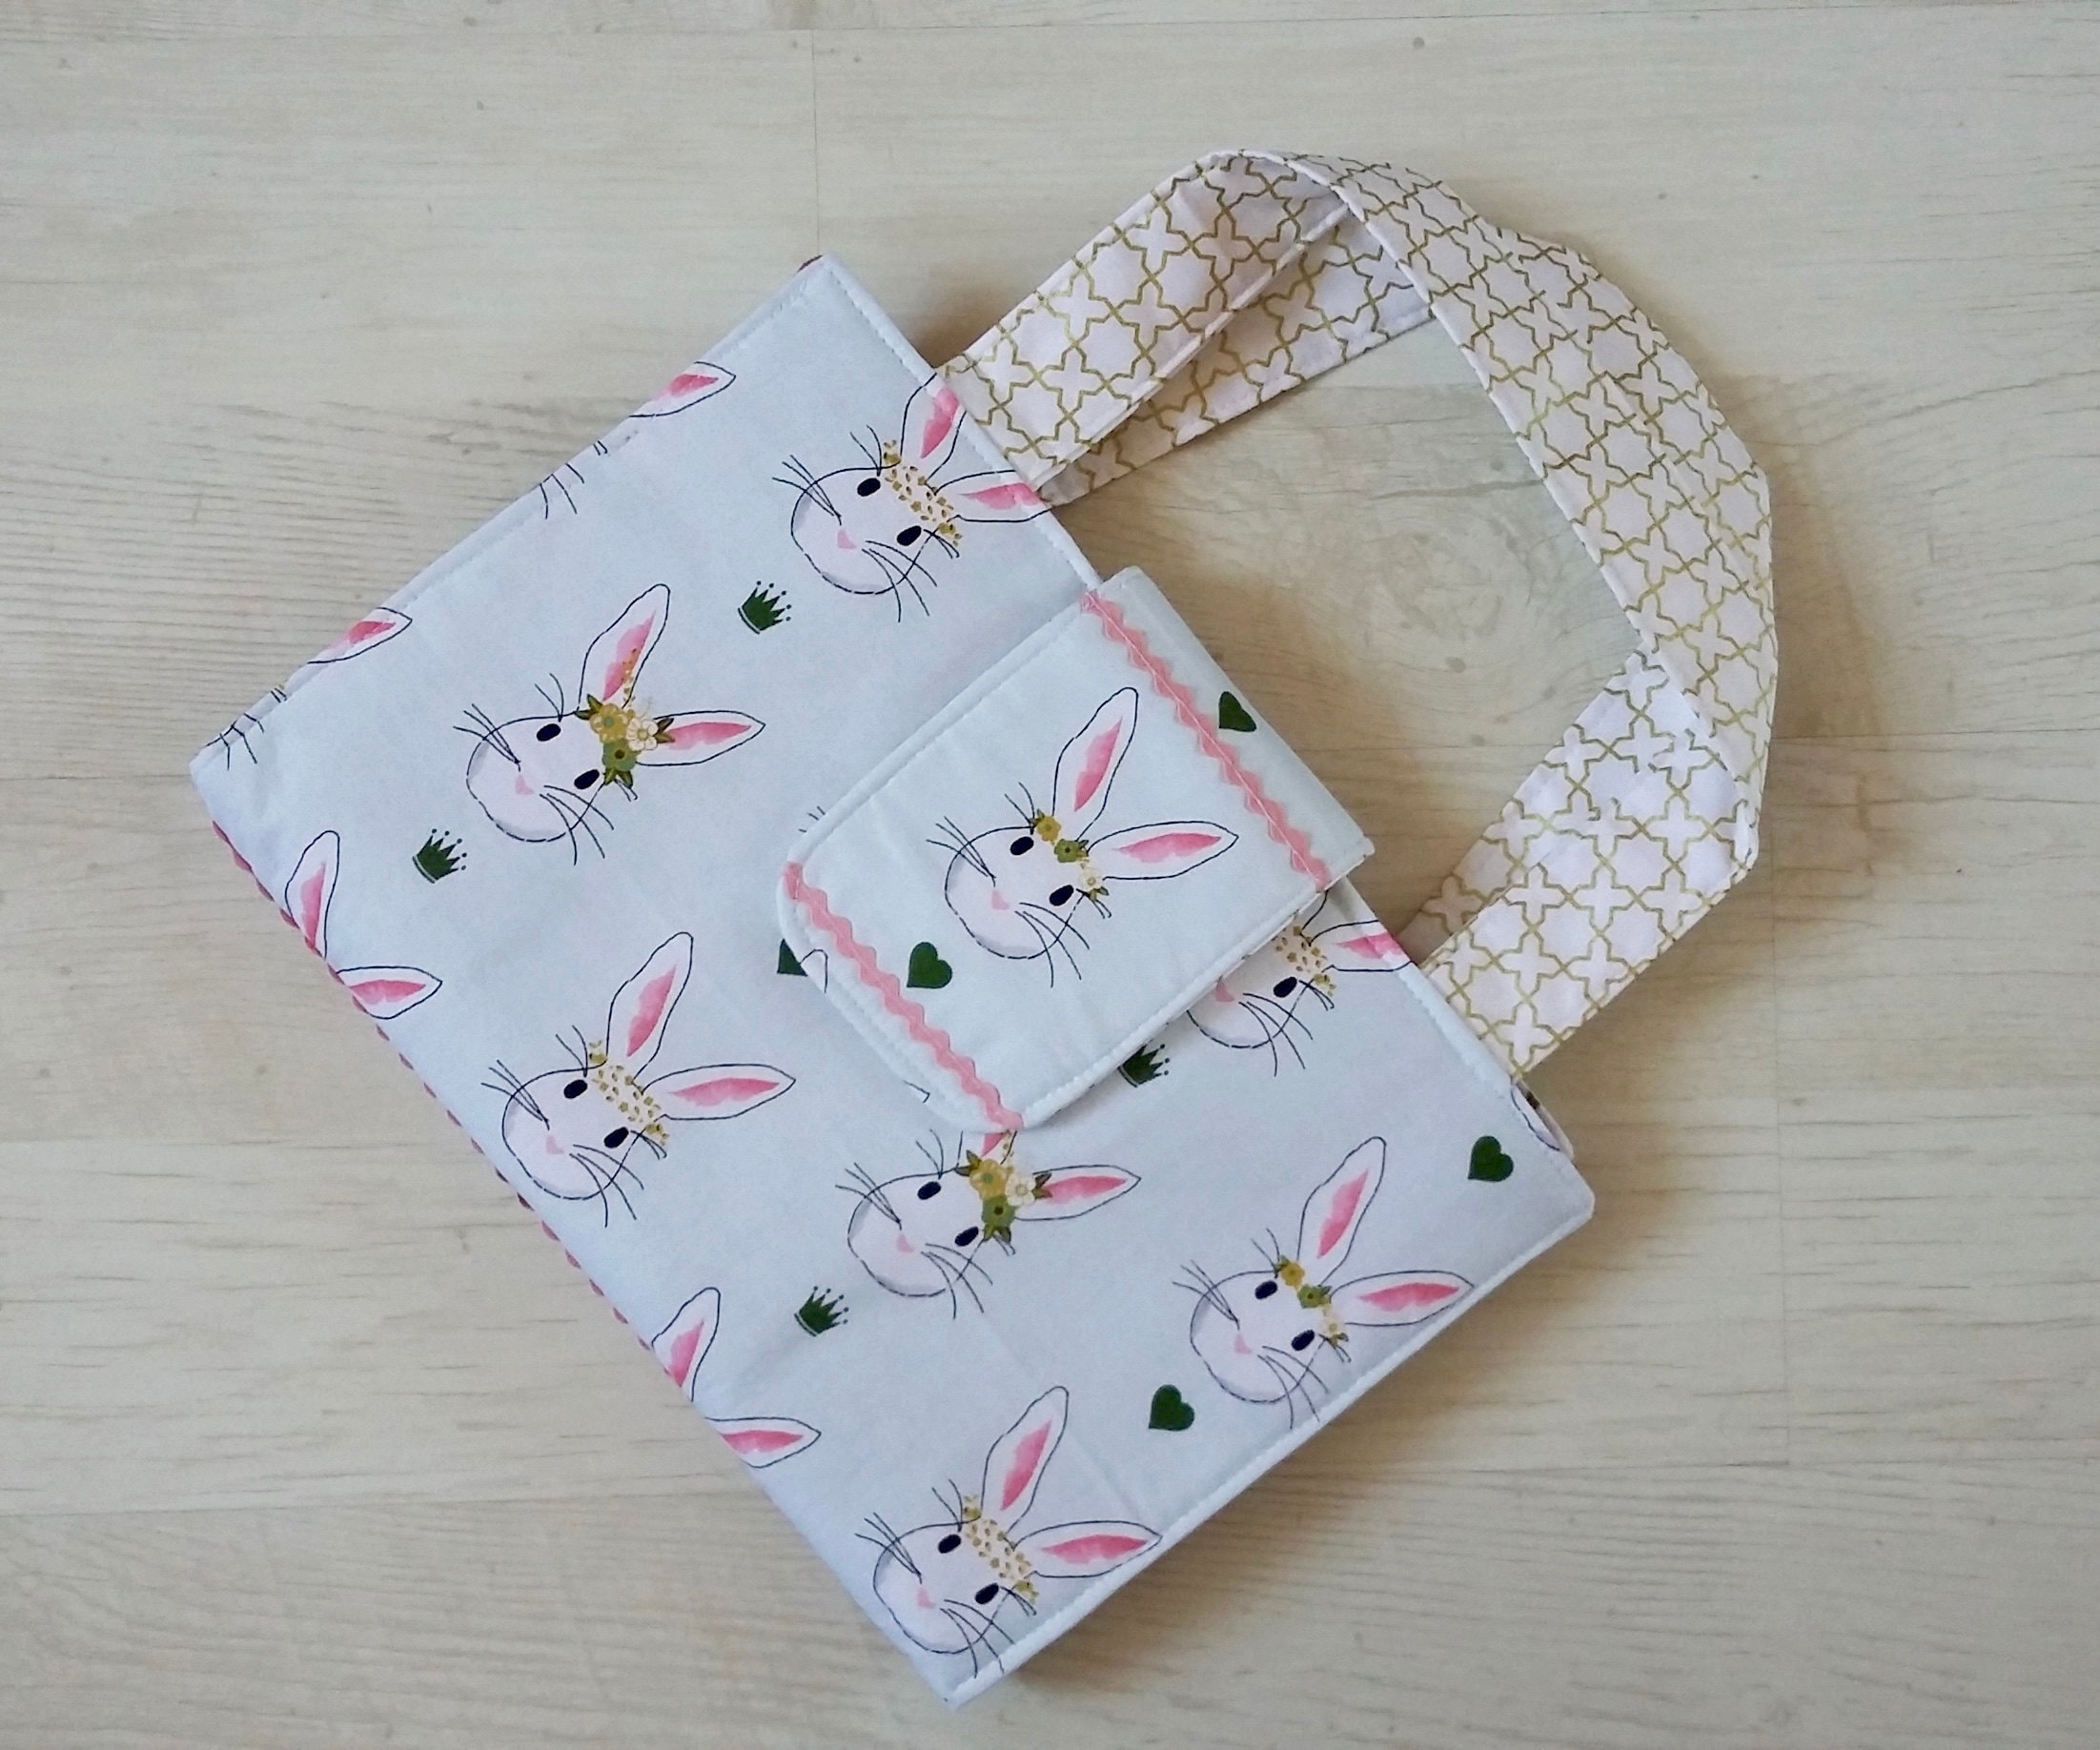
Create this fun art caddy with just three fat quarters from the Wonderland collection by Melissa Mortensen for Riley Blake!

The art caddy can hold an A5 size sketch pad or writing paper and 12 felt tip pens/twistable crayons. It’s perfect for travel or taking to restaurants for some quiet entertainment - kids love toting these caddies around and it’s a great way for them to keep their pens tidy too! Once you’ve mastered the basic design, why not add extra pockets on the back or inside and embellish or personalise with the child’s name.
Finished size: 8inch x 12inch when folded Seam allowance, unless otherwise stated: 1/4 inch
Materials:
3 coordinating fat quarters; I used: 1 FQ Wonderland main blue (outer fabric) 1 FQ Wonderland labyrinth (coordinating outer fabric) 1 FQ Wonderland white floral (lining fabric) 2inch piece white sew on Velcro 13inch x 18inch wadding/fleece (I used 2oz polyester wadding, you can also use a sew in or fusible fleece.) 0.75m medium iron-on interfacing 6.5inch x 4inch scrap of fleece or wadding 0.5m ricrac or ribbon (optional) Basic sewing kit
Cutting instructions:
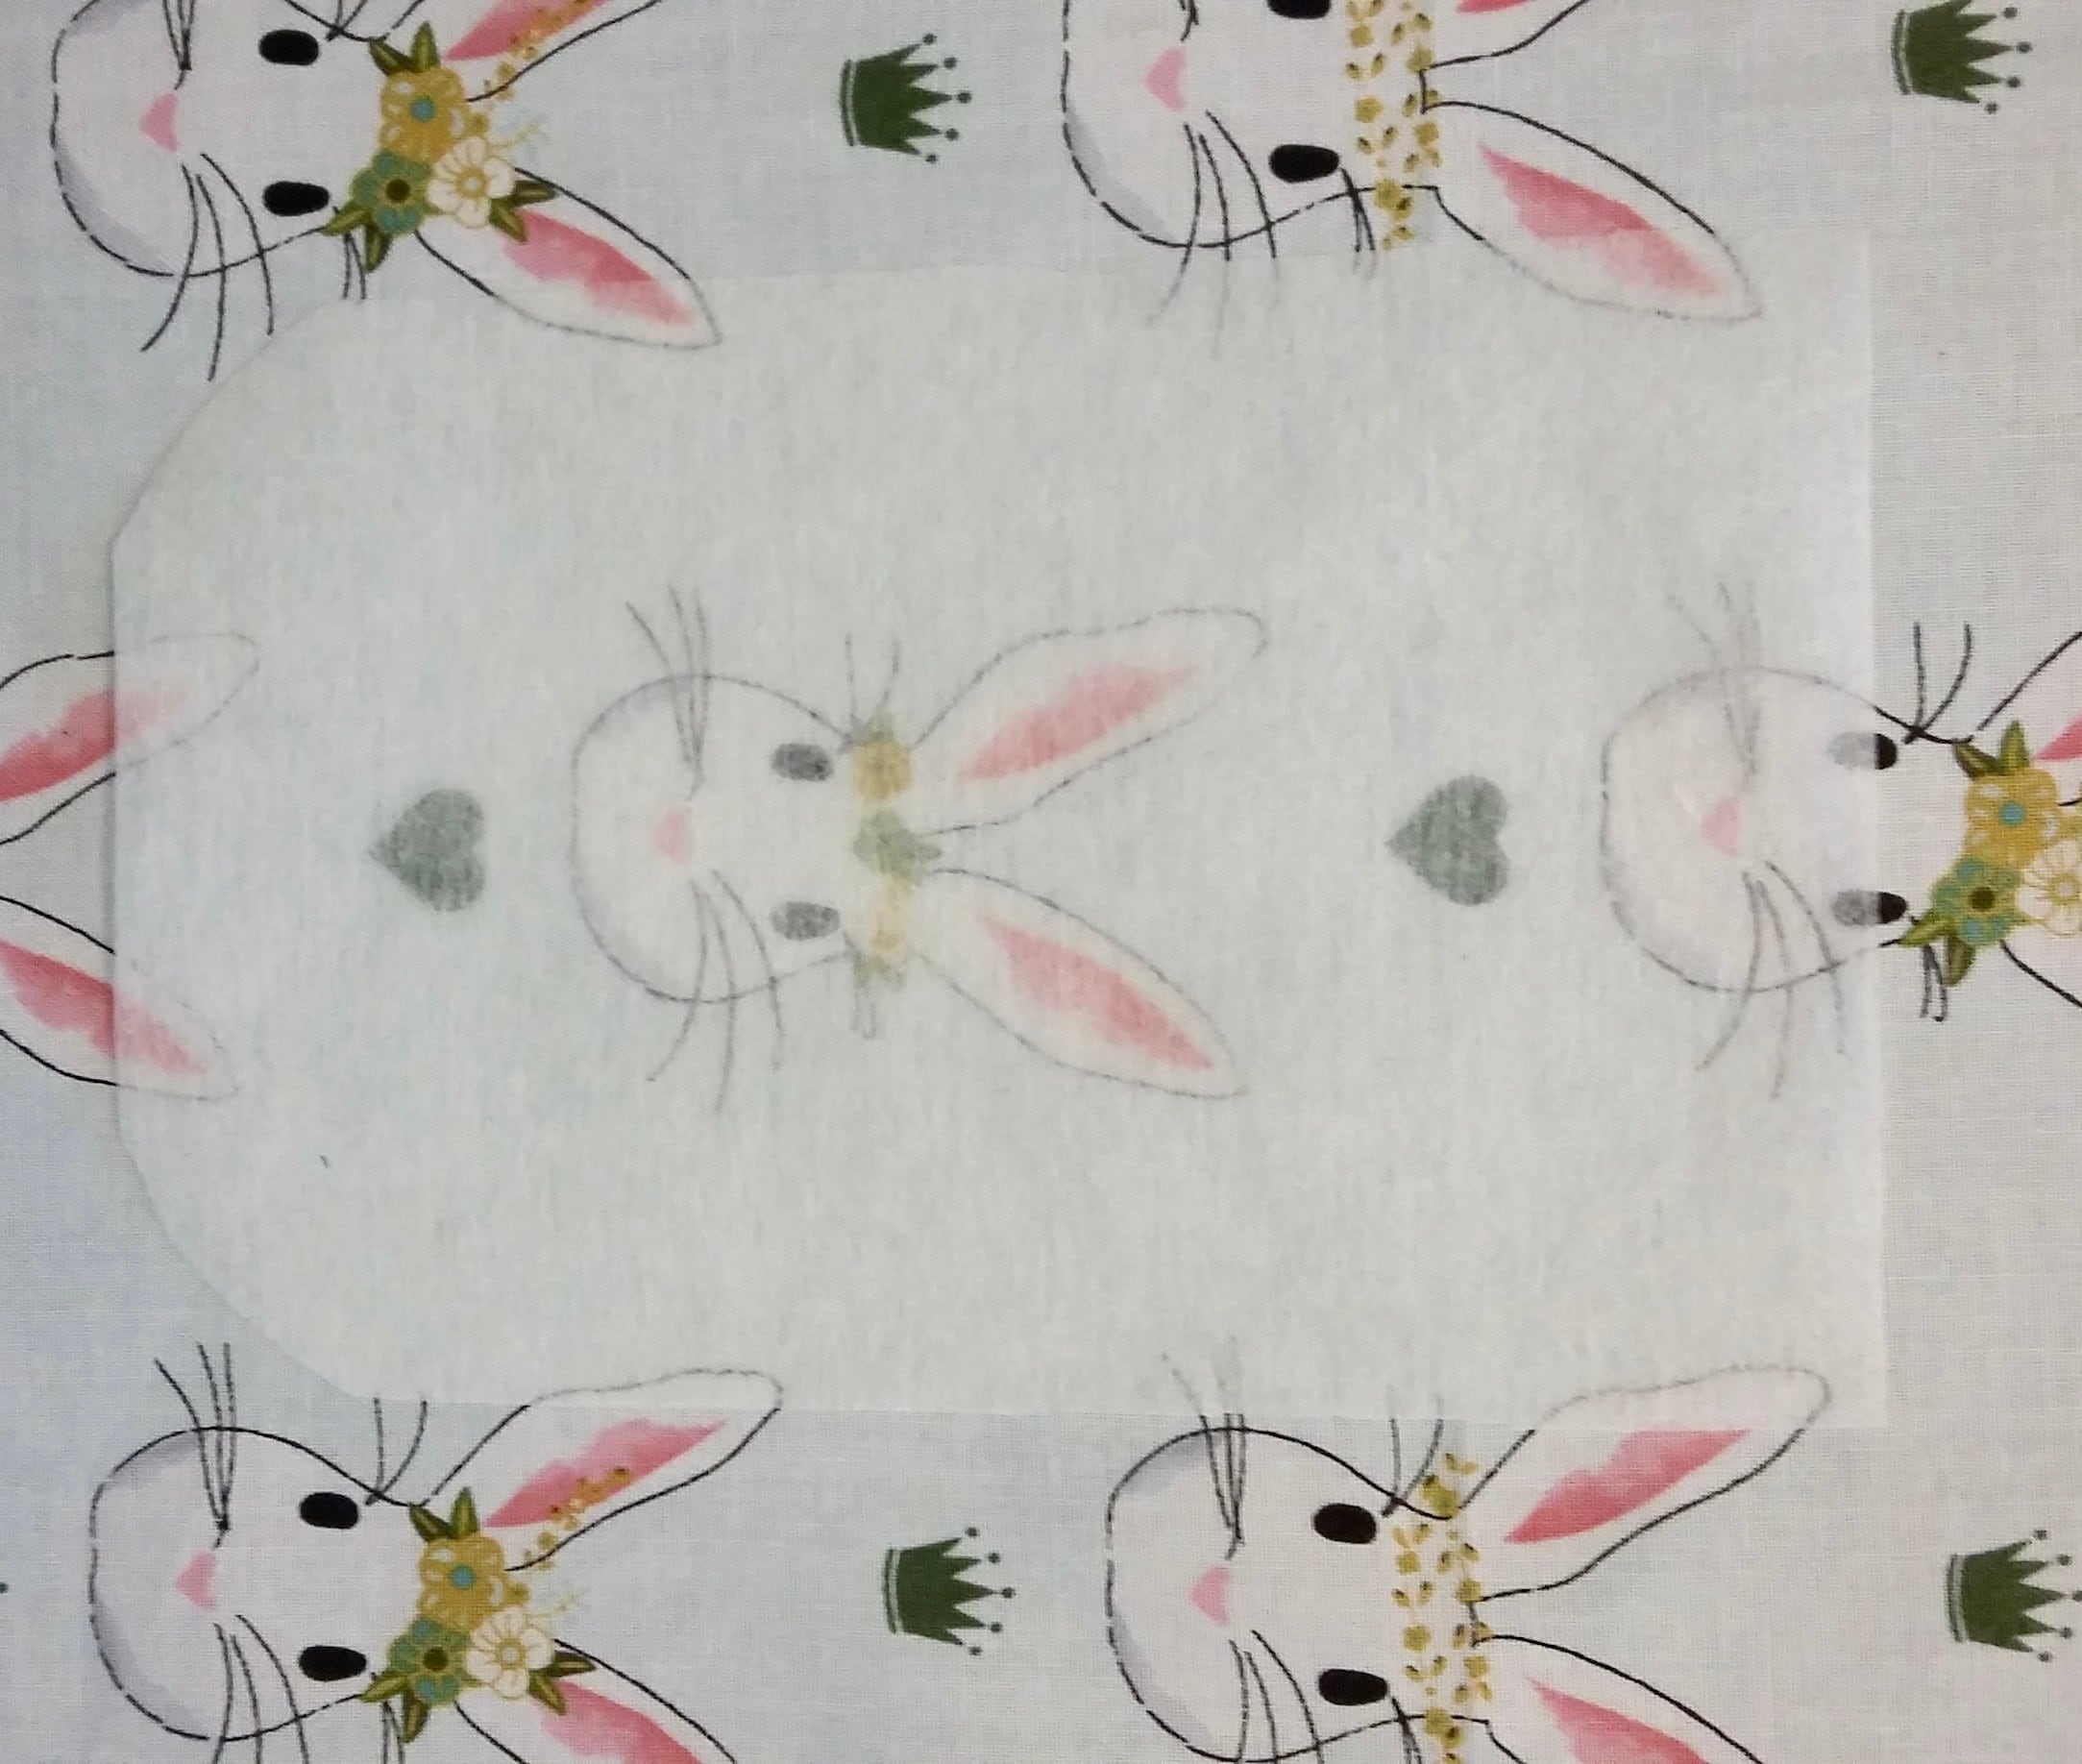
Cut the following from the outer fabric (rabbits) 2 rectangles 13inch wide x 10inch high (if using a non directional print cut 1 rectangle 13inch x 18inch) 1 rectangle 8.5inch w x 8inch h for the pad pocket (make sure rabbits run along the width) 1 rectangle 6.5inch x 4inch for the flap. Tip: cut interfacing piece first and position over the outer fabric to centre a rabbit on the flap.
Cut the following from the coordinating outer fabric (labyrinth)
2 rectangles 16inch x 6inch for the handles 1 rectangle 6.5inch x 4inch for the flap 1 rectangle 13inch x 7.5inch for the pen pockets
Cut the following from lining fabric (white floral)
1 rectangle 13inch x 18inch 1 rectangle 8.5inch x 8inch for the pad pocket
Cut and fuse interfacing to the wrong side of fabrics as follows:
2 rectangles 13inch x 10inch (outer 2 rabbit rectangles) 1 rectangle 13inch x 18inch (lining white floral) 2 rectangles 16inch x 6inch (handles) 1 rectangle 8.5inch x 8inch for the pad pocket (outer) 1 rectangle 13inch x 7.5inch for the pen pockets 1 rectangle 6.5inch x4inch (flap lining)
From the wadding cut 1 rectangle 18inch x 13inch for the caddy body and 1 rectangle 6.5inch x 4inch for the flap.
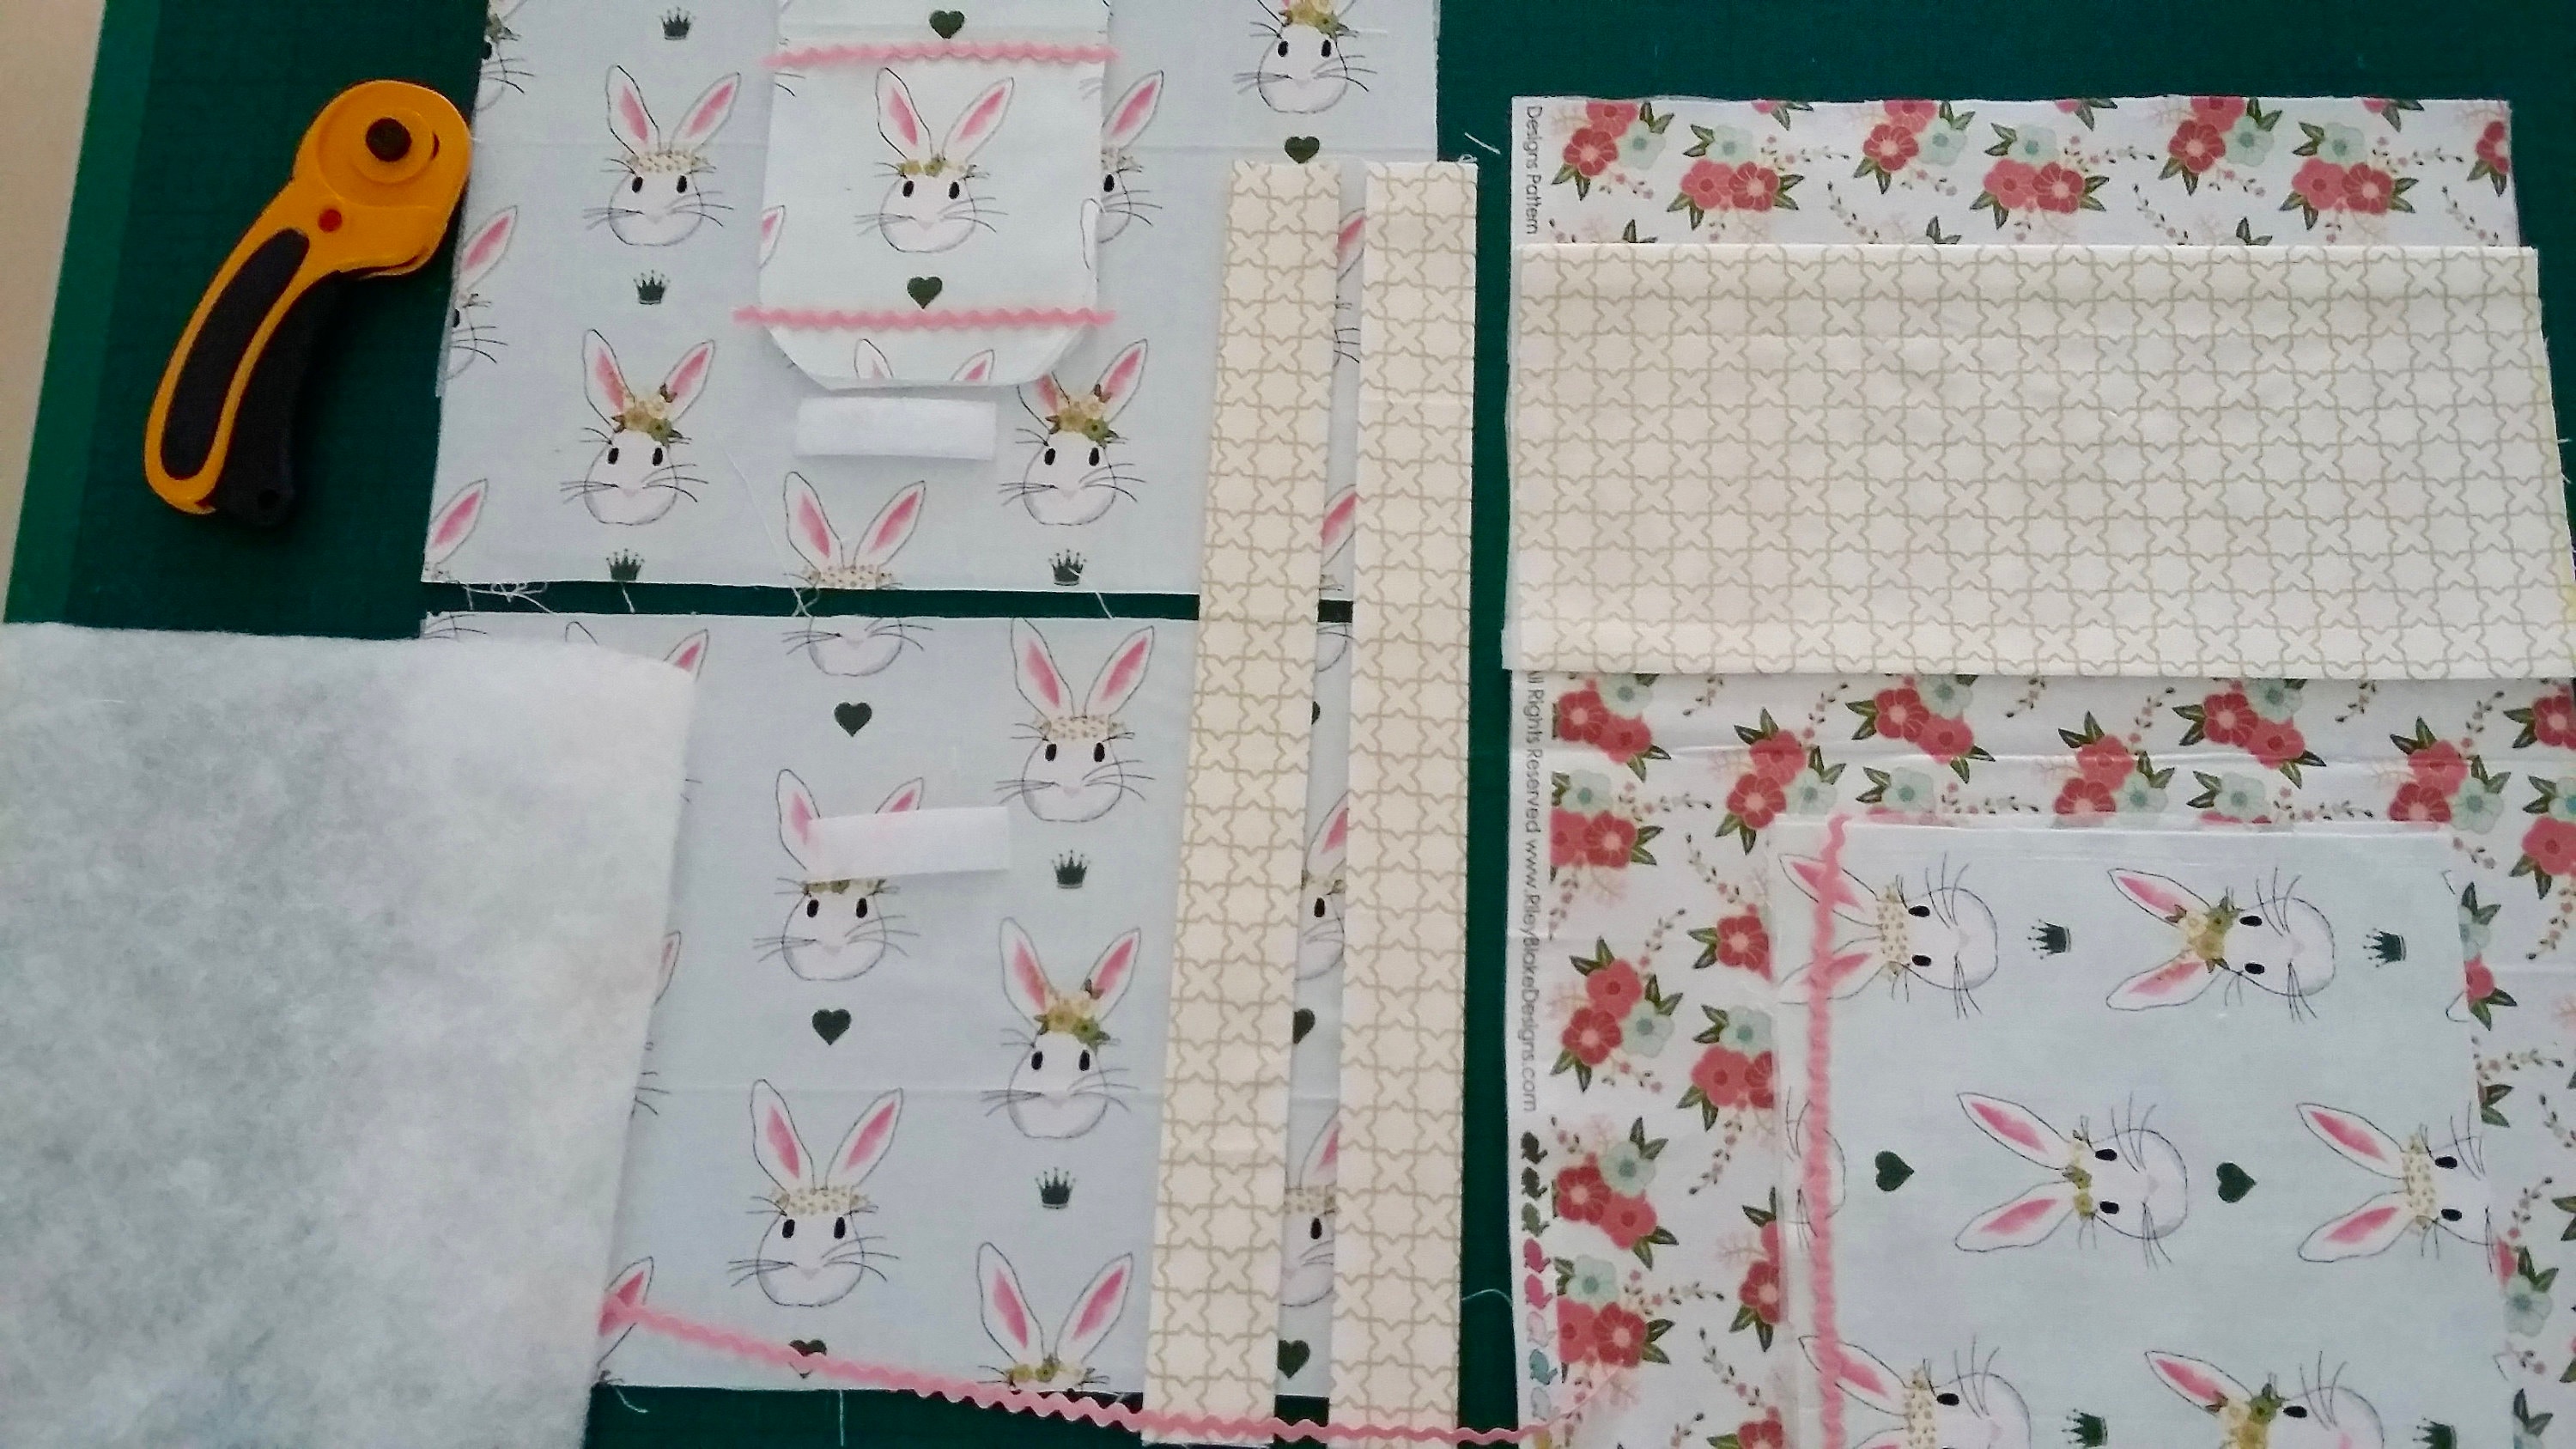
Here is a rough layout of the art caddy outer and lining in pieces.
Preparing the pieces:
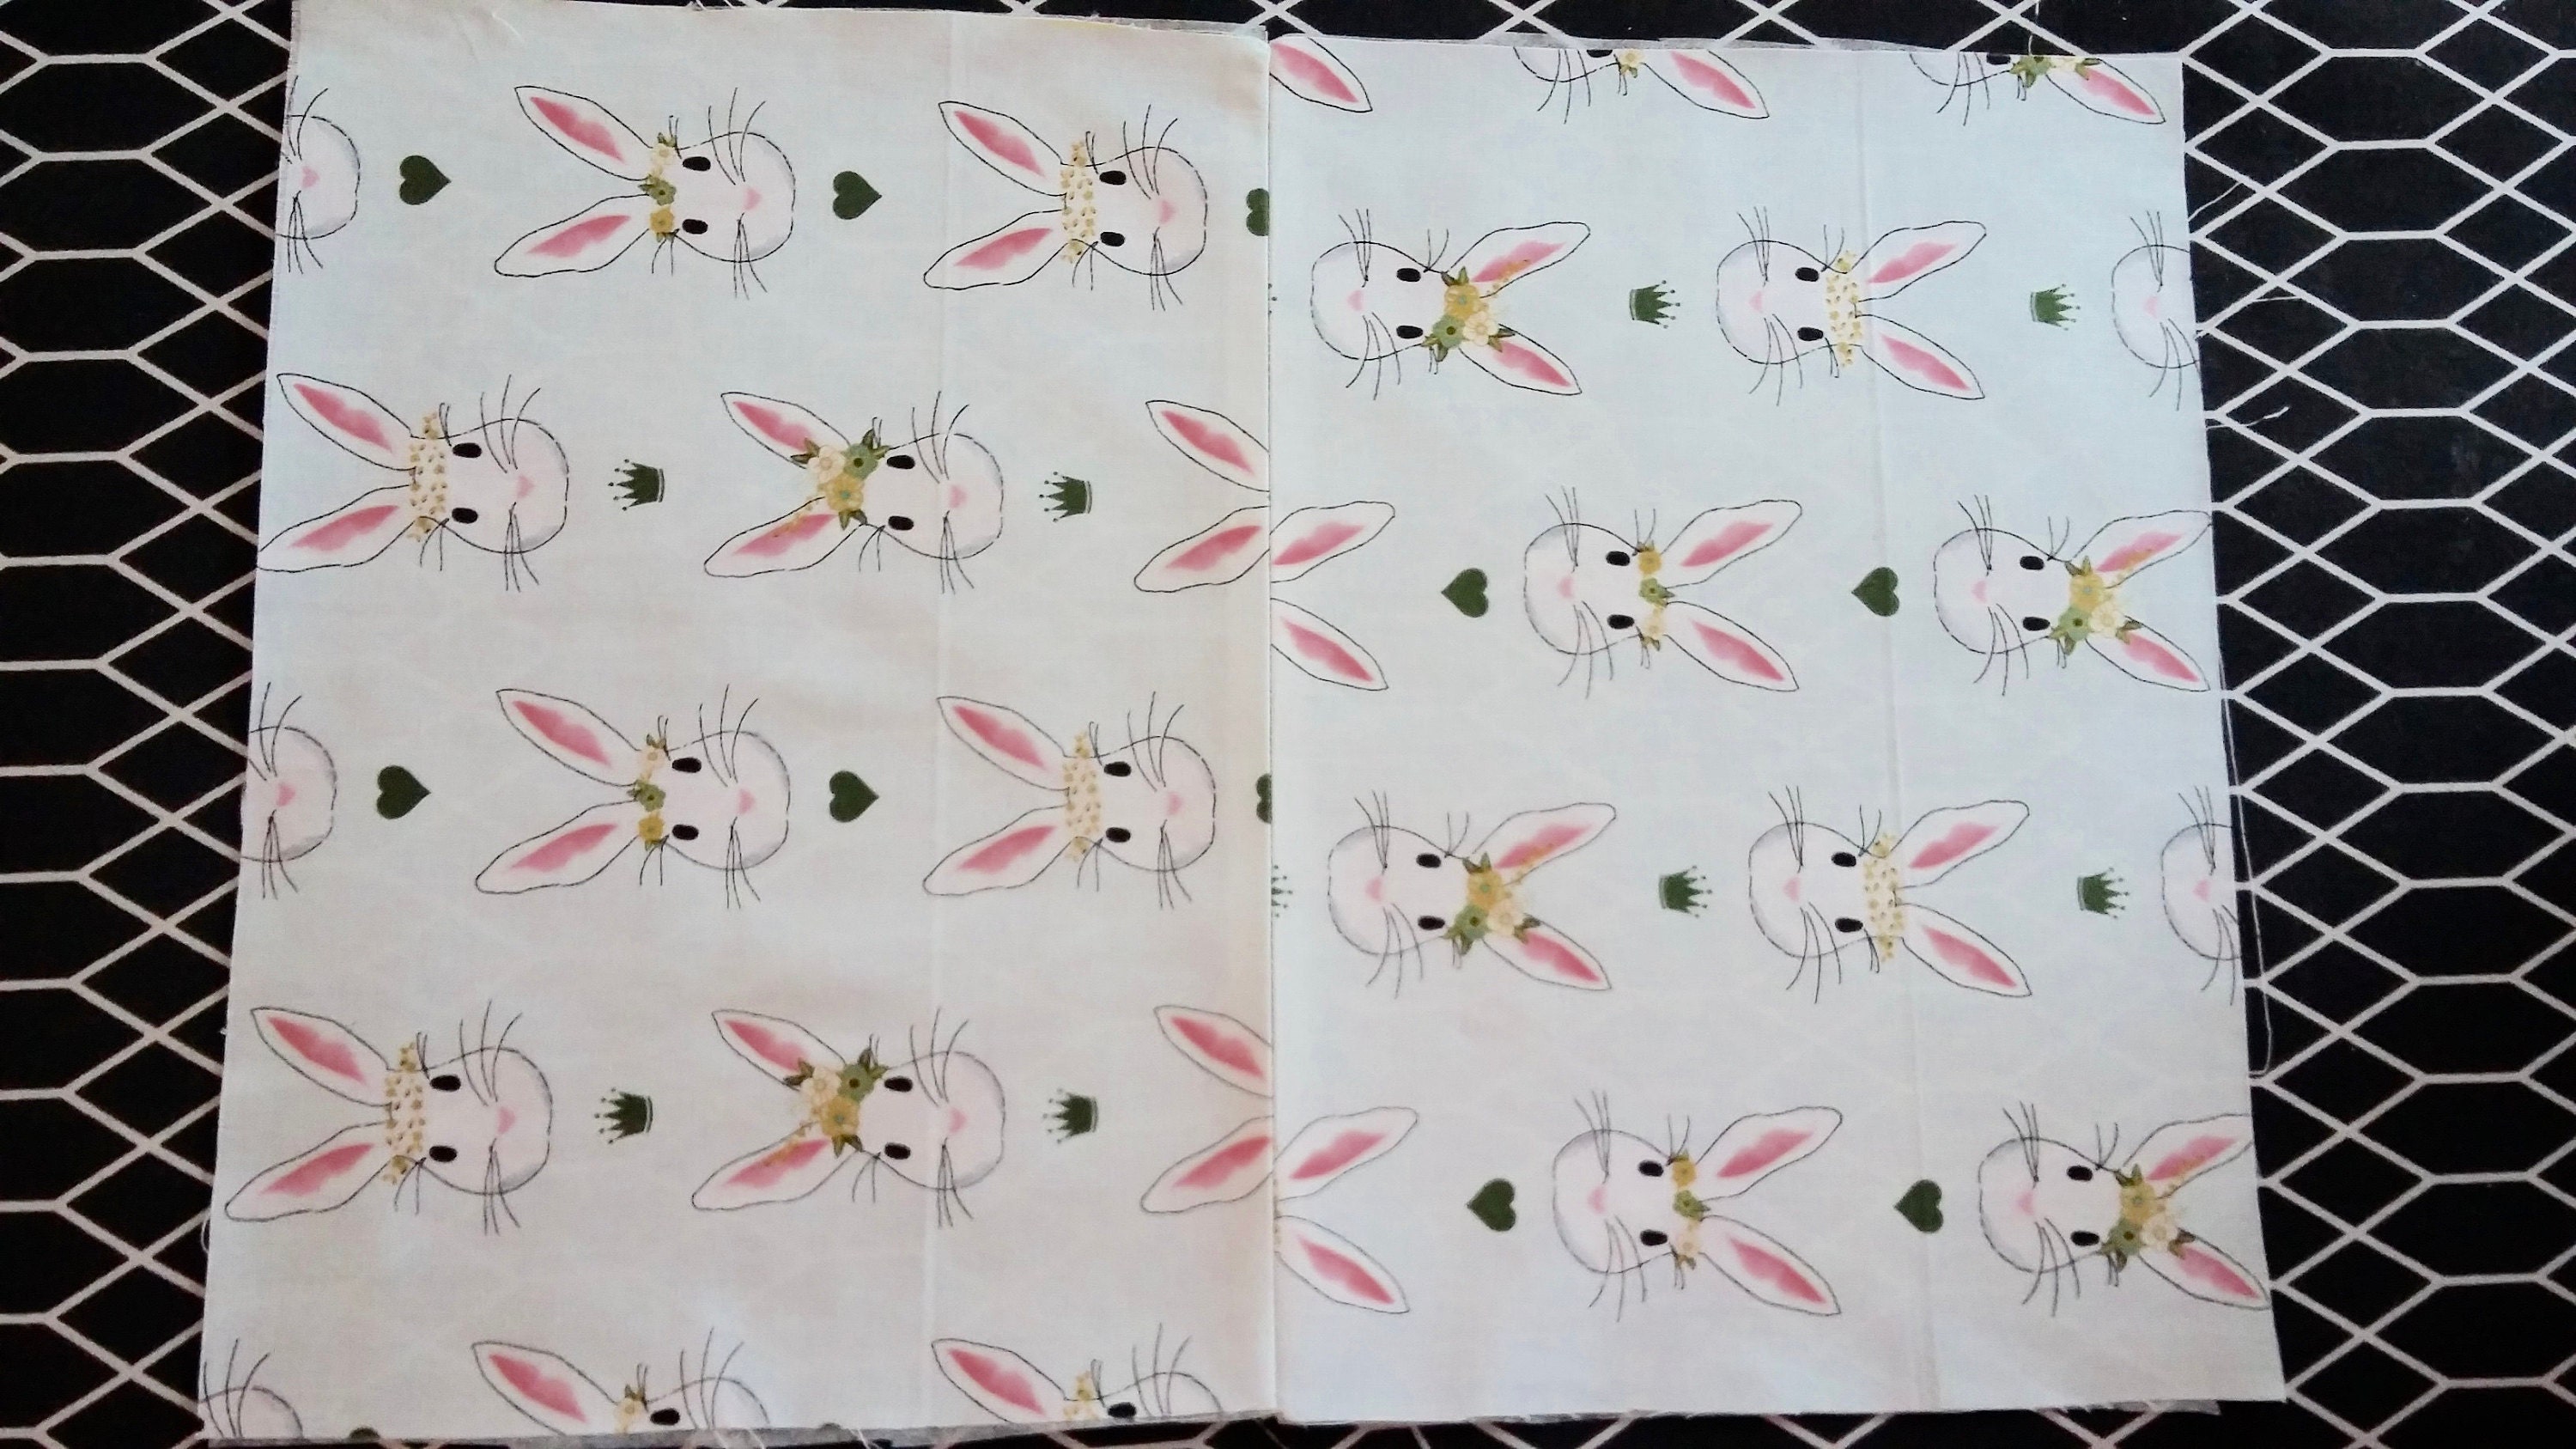
1. Outer fabric
If using directional fabric, place the two 13inch x 9inch rectangles right sides together making sure that the print on both pieces is pointing in the opposite direction. Sew along the long side with a 1/4inch seam allowance. This will be the middle of your caddy. Press open seam allowance and if you’d like you can sew a piece of ric rac above this central seam on the right side. Set aside.
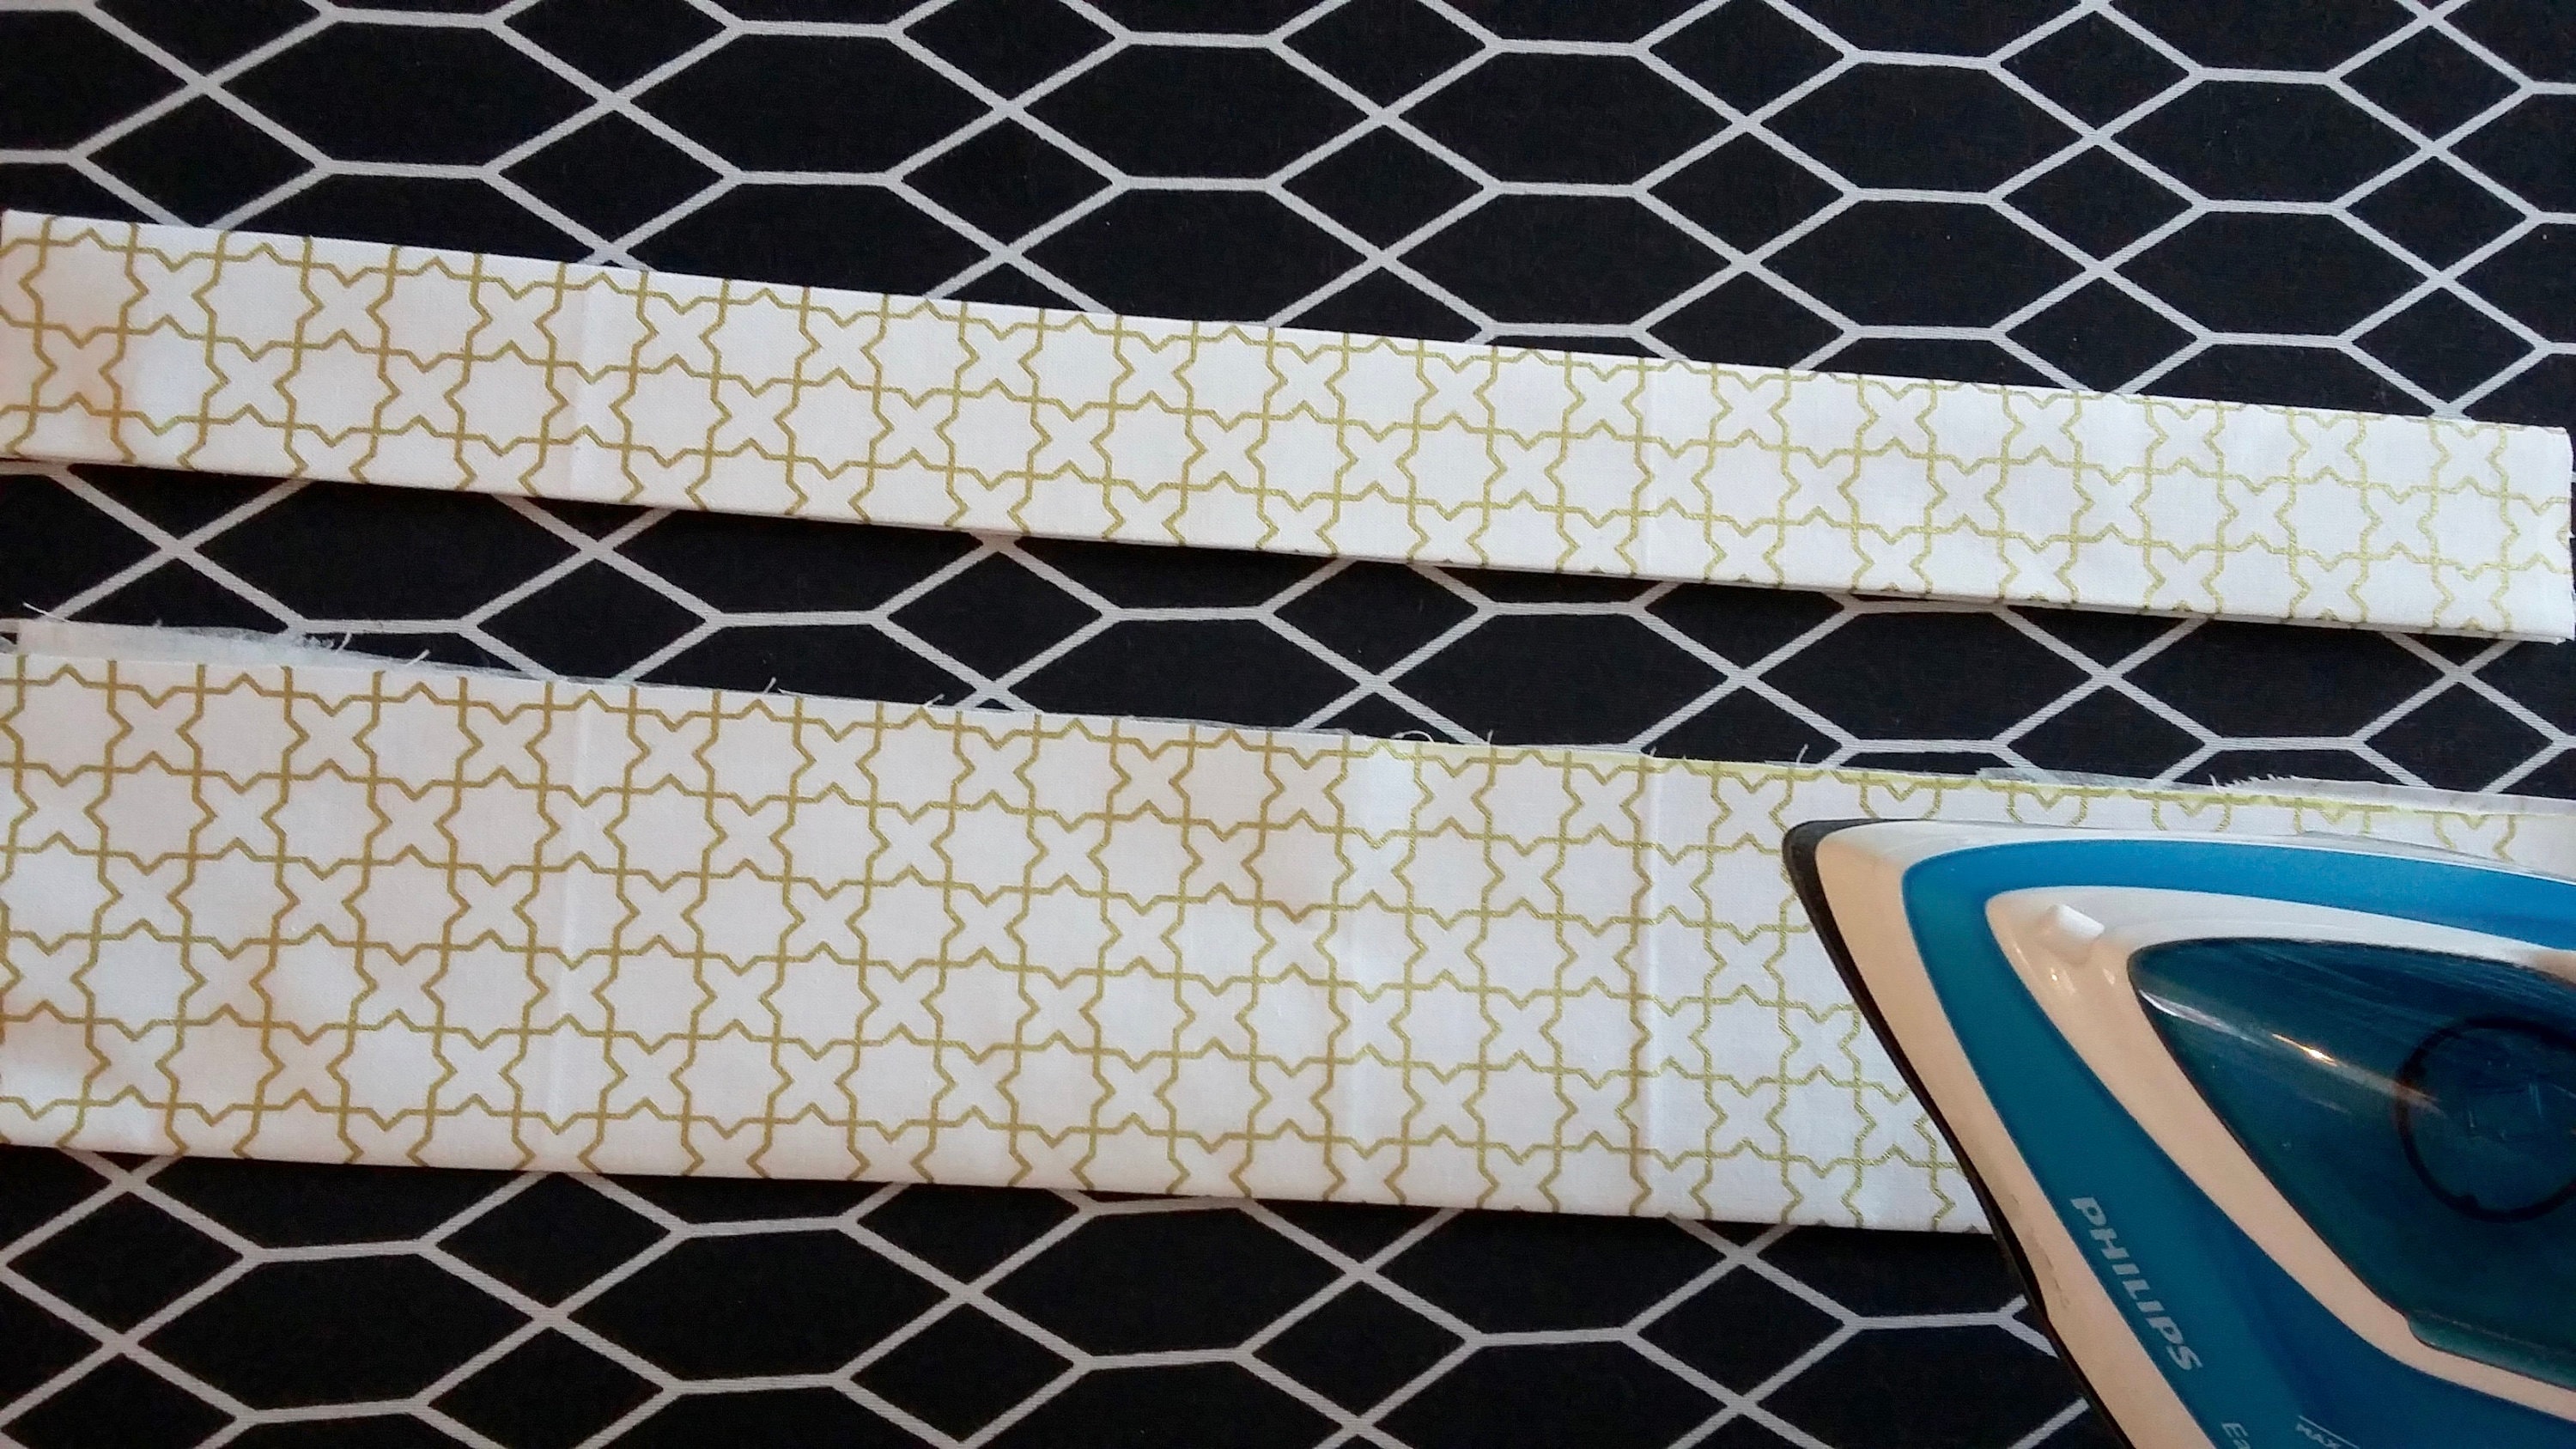
2. Handles
Fold the 16inch x 6inch rectangle in half lengthwise and press to make a centre crease. Open out, then fold each long raw edge in towards the centre and press. Fold again in half and press to make a 16inch x 1.5inch handle with no raw edges showing. Topstitch along each long side of the handle. Repeat with other handle piece and set aside.

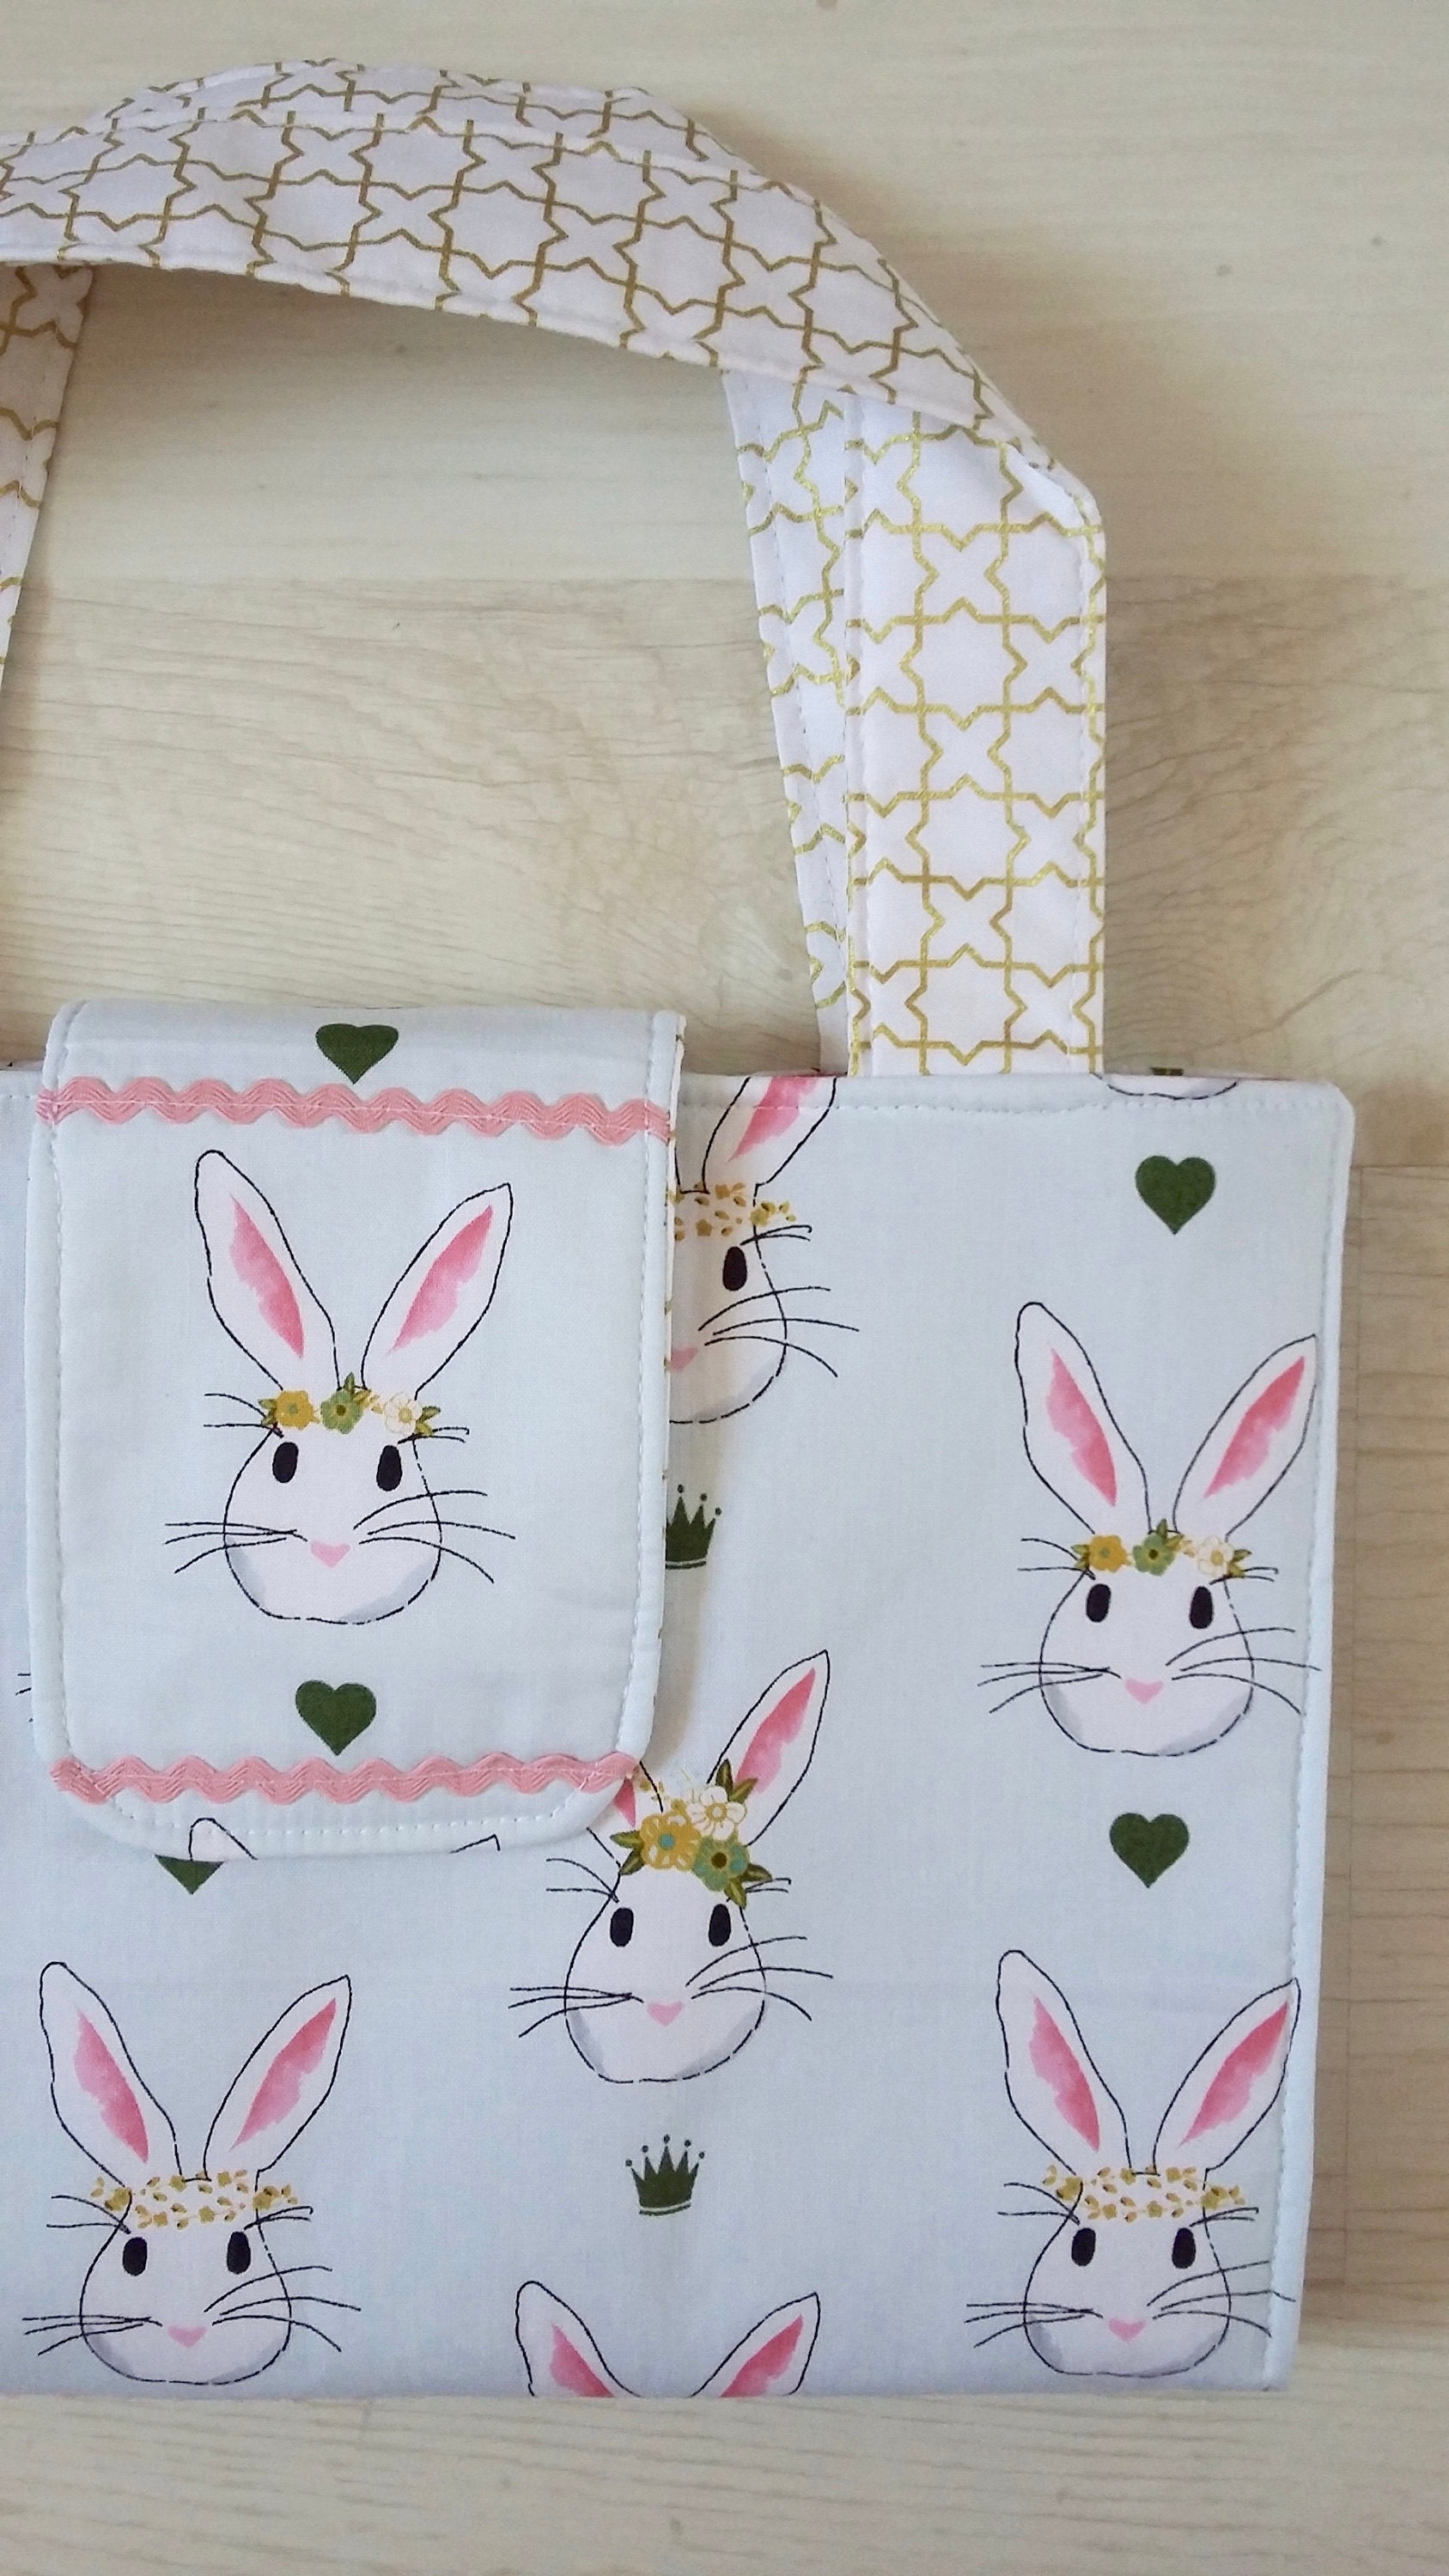
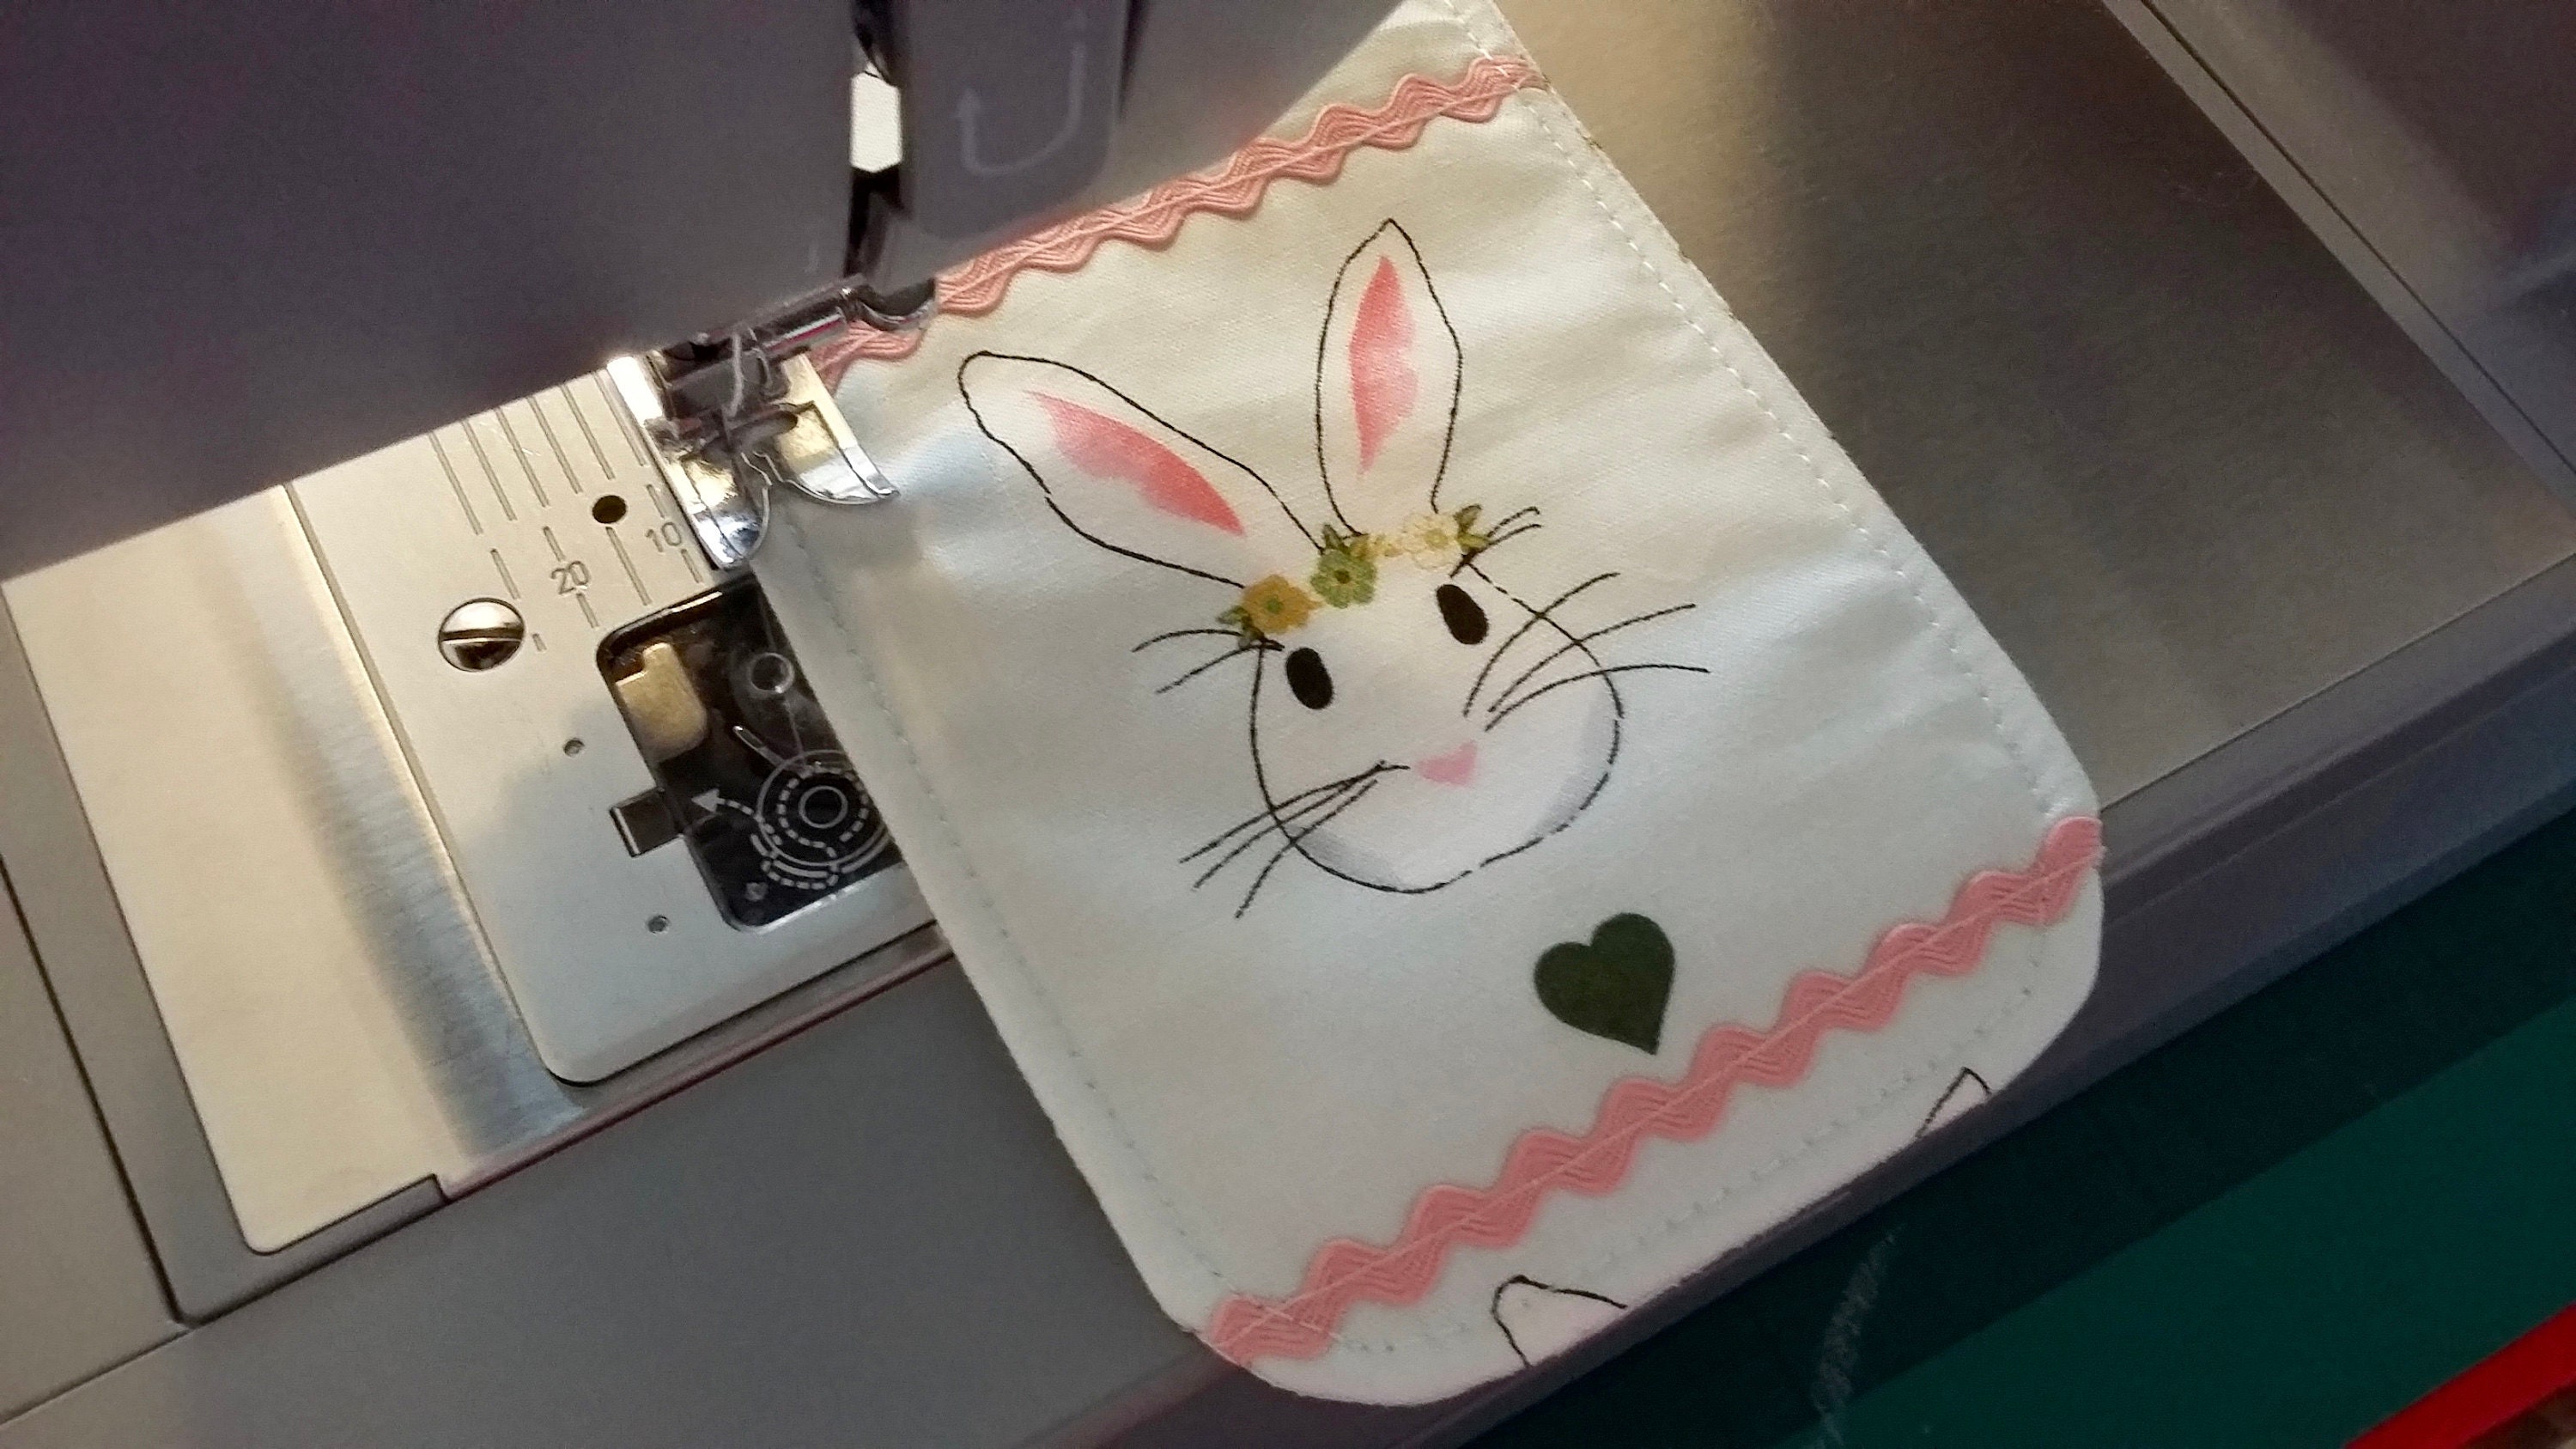
3. Flap
Fold the lining piece 6.5inch x 4inch and finger press to make a centre crease. Cut a curve on the long raw edge, then place the lining piece onto the outer flap and cut the same curve. Do this to the fleece scrap as well.If you want to decorate the flap like I did, sew ricrac or ribbon onto the outer flap piece to frame the rabbit. Take the rough side of the Velcro and centre it horizontally onto the lining flap 1inch up from the raw edge. Pin/hold in place while you sew around the Velcro making sure to backstitch.Place the outer and lining flap pieces right sides together, then place the fleece scrap on top and clip/pin together. Starting at the top right edge, sew around the flap leaving the top short straight edge open. Trim seam allowance to 1/8inch, turn the flap out and press very carefully on the outer flap – do not get your iron near the Velcro or you will melt it!! Topstitch the flap piece and set aside.
4. Pad Pocket
I decorated the top of the pad pocket with some ricrac. Pin the pad pocket outer and lining pieces 8.5inch x 8inch right sides together making sure that the rabbits are facing up! Starting at the bottom right 8.5inch edge (with the wrong side of the rabbit fabric facing up), sew around the three sides leaving one side open to turn out. Trim seam allowance. Flip the pieces wrong sides together, use a pointy tool or finger to gently poke out the corners and press. Topstitch the top edge only. Set aside.
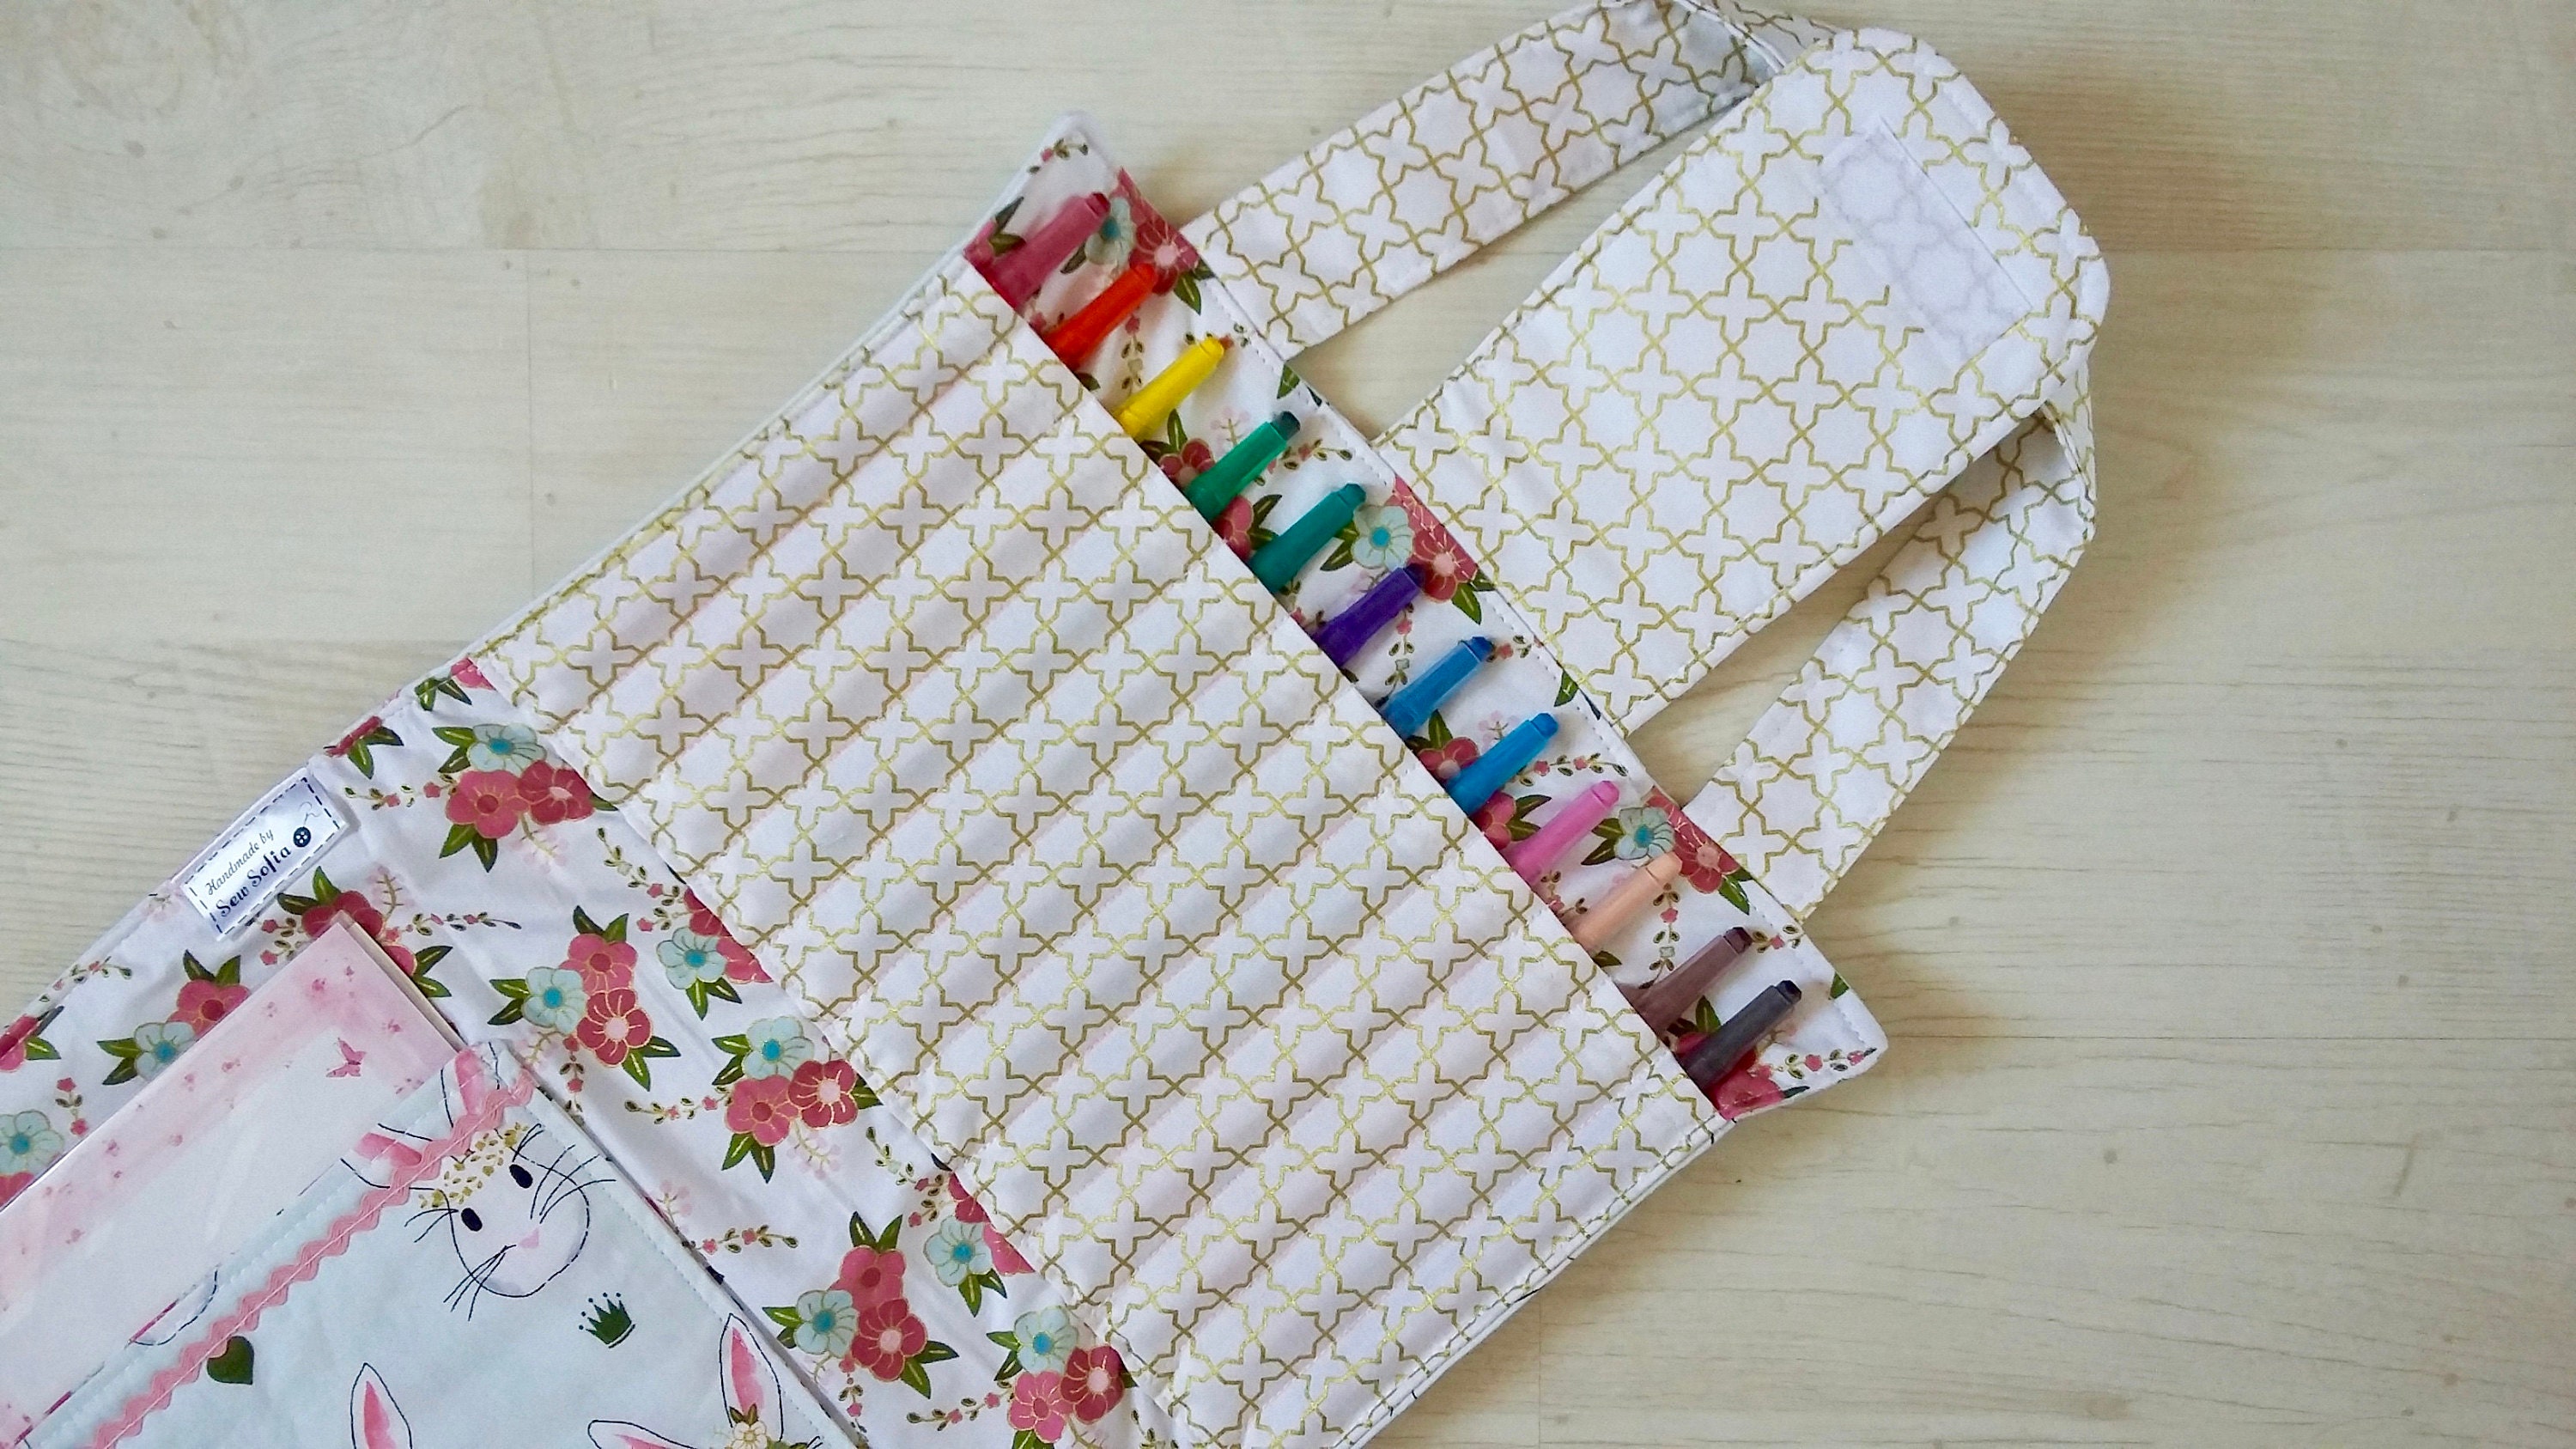
5. Pen Pockets
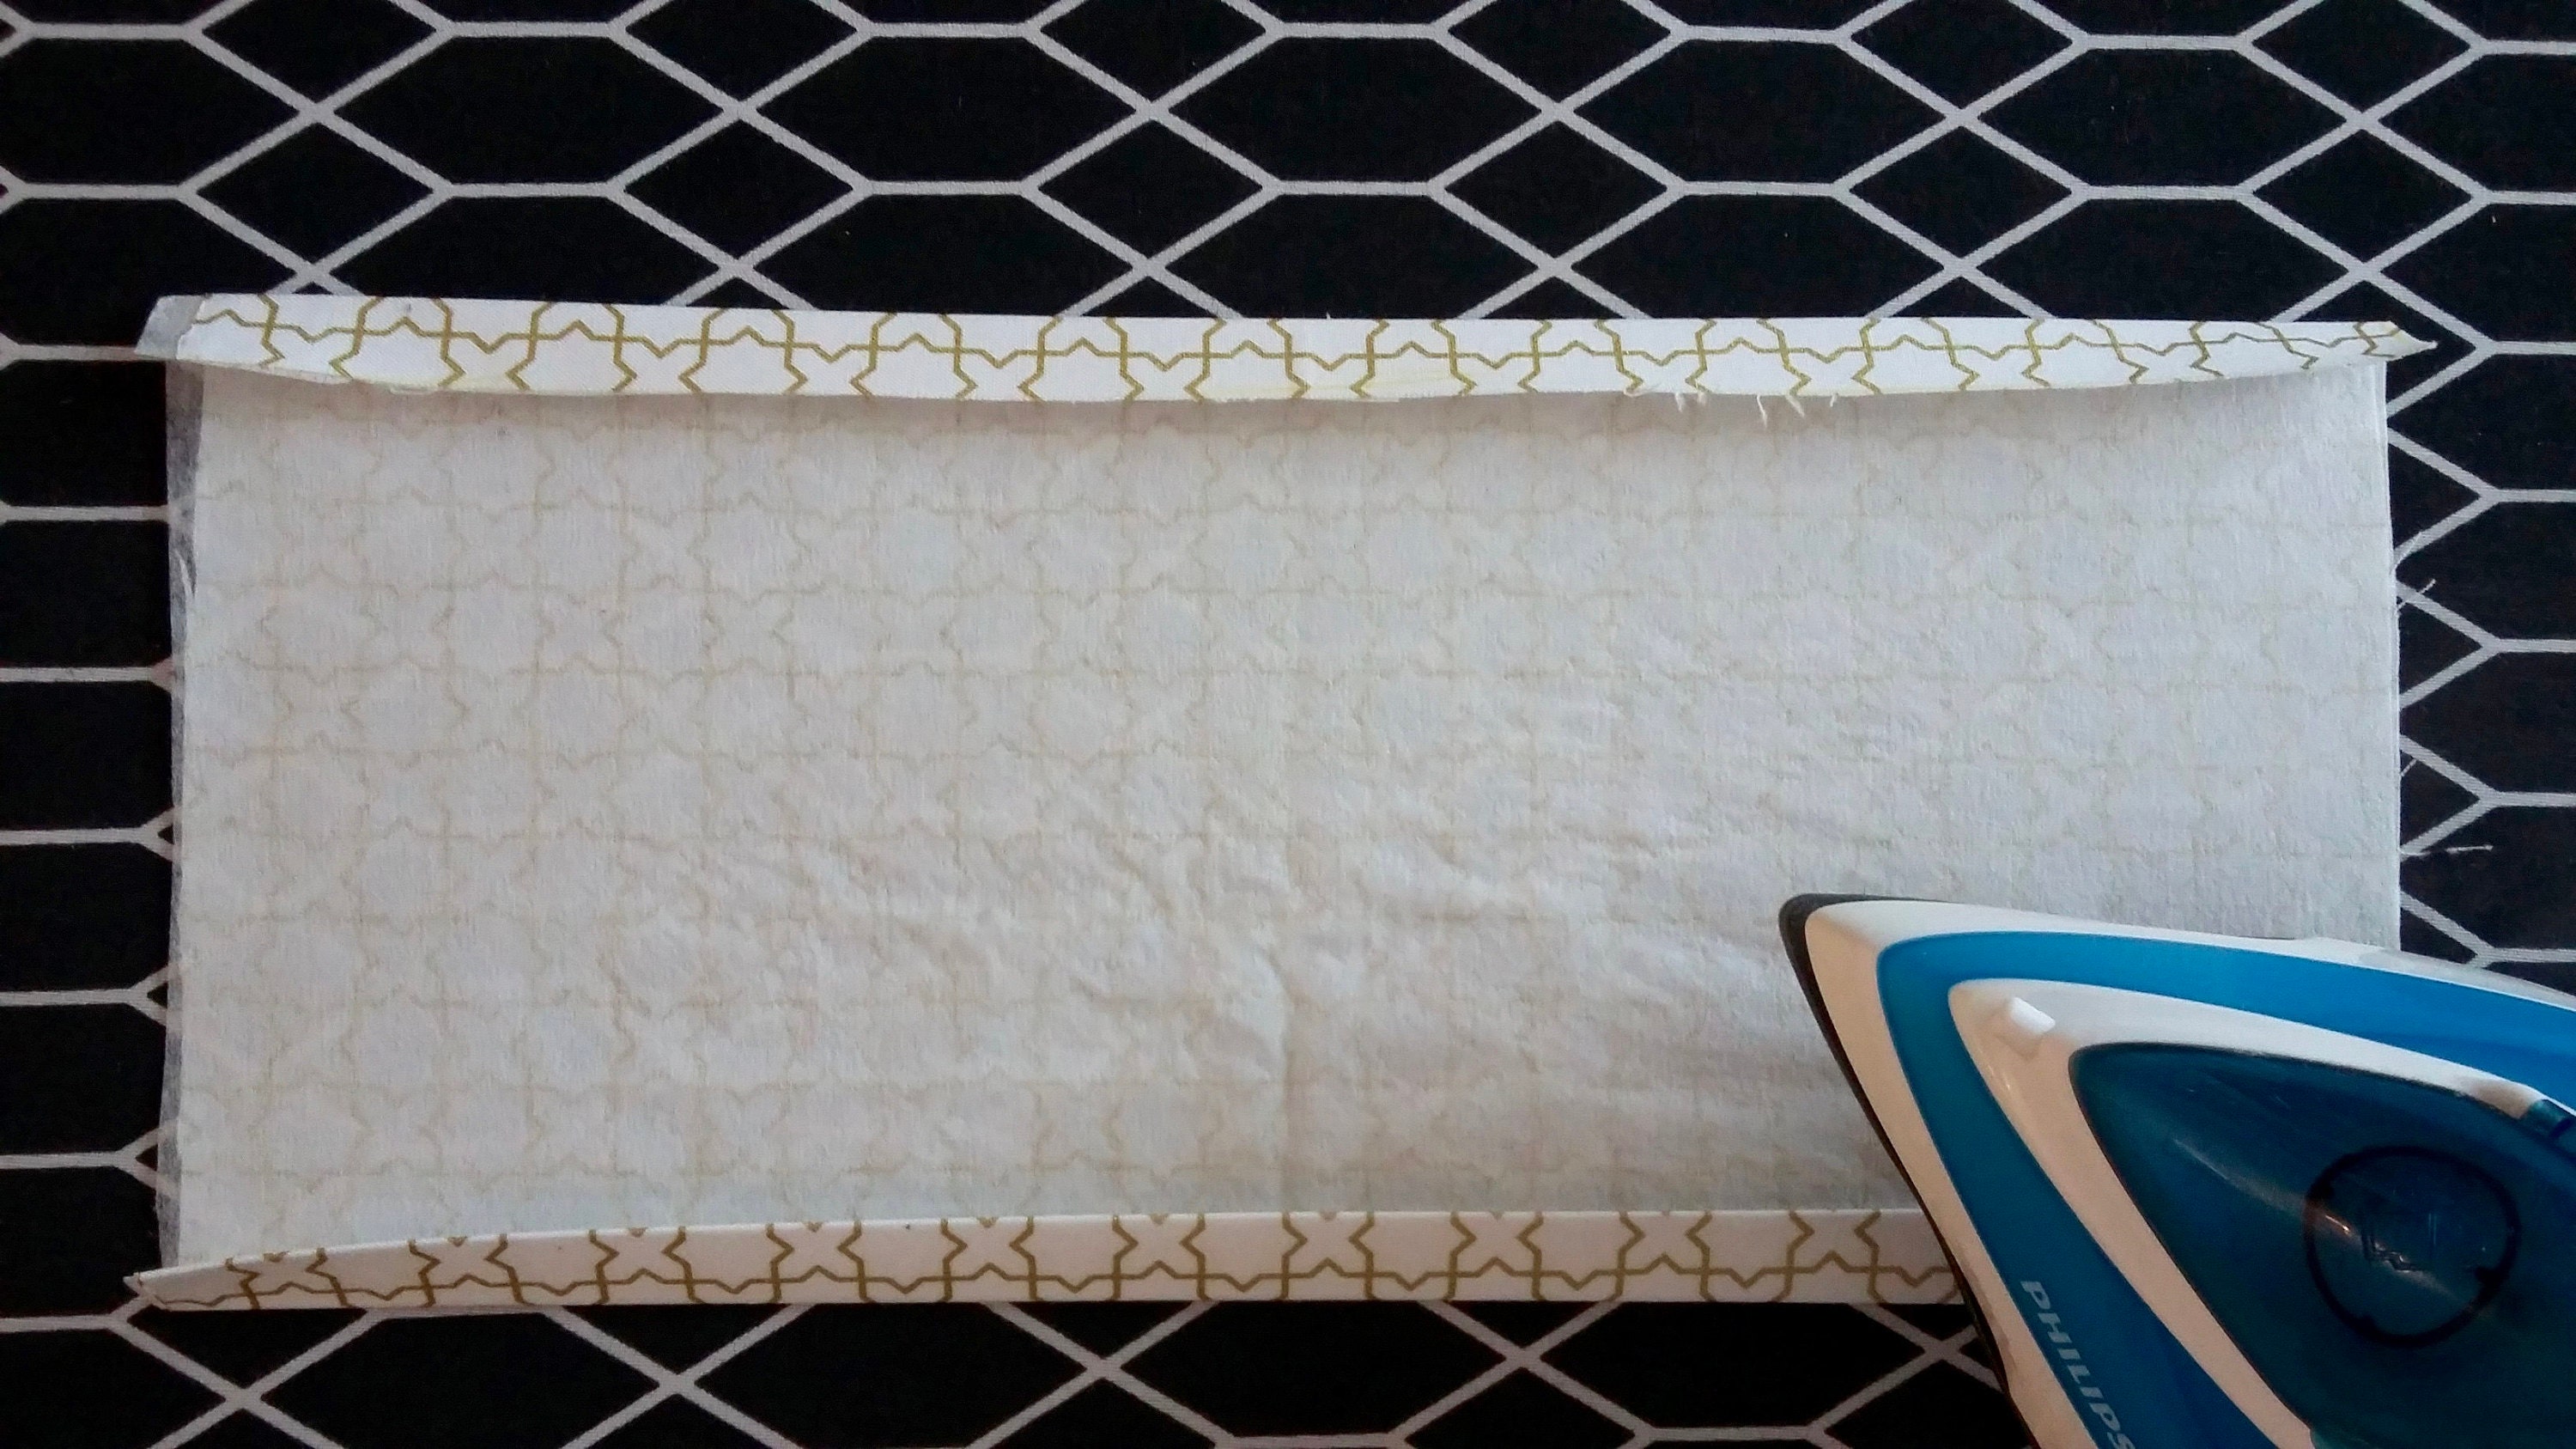
Turn under one long edge of the pen pocket piece 13inch x 7.5inch by 1/4inch, press and then turn under again by 1/4inch. Topstitch along this long edge only. Turn under the other long edge once only and press.

Making the art caddy:
6. The pen pockets:
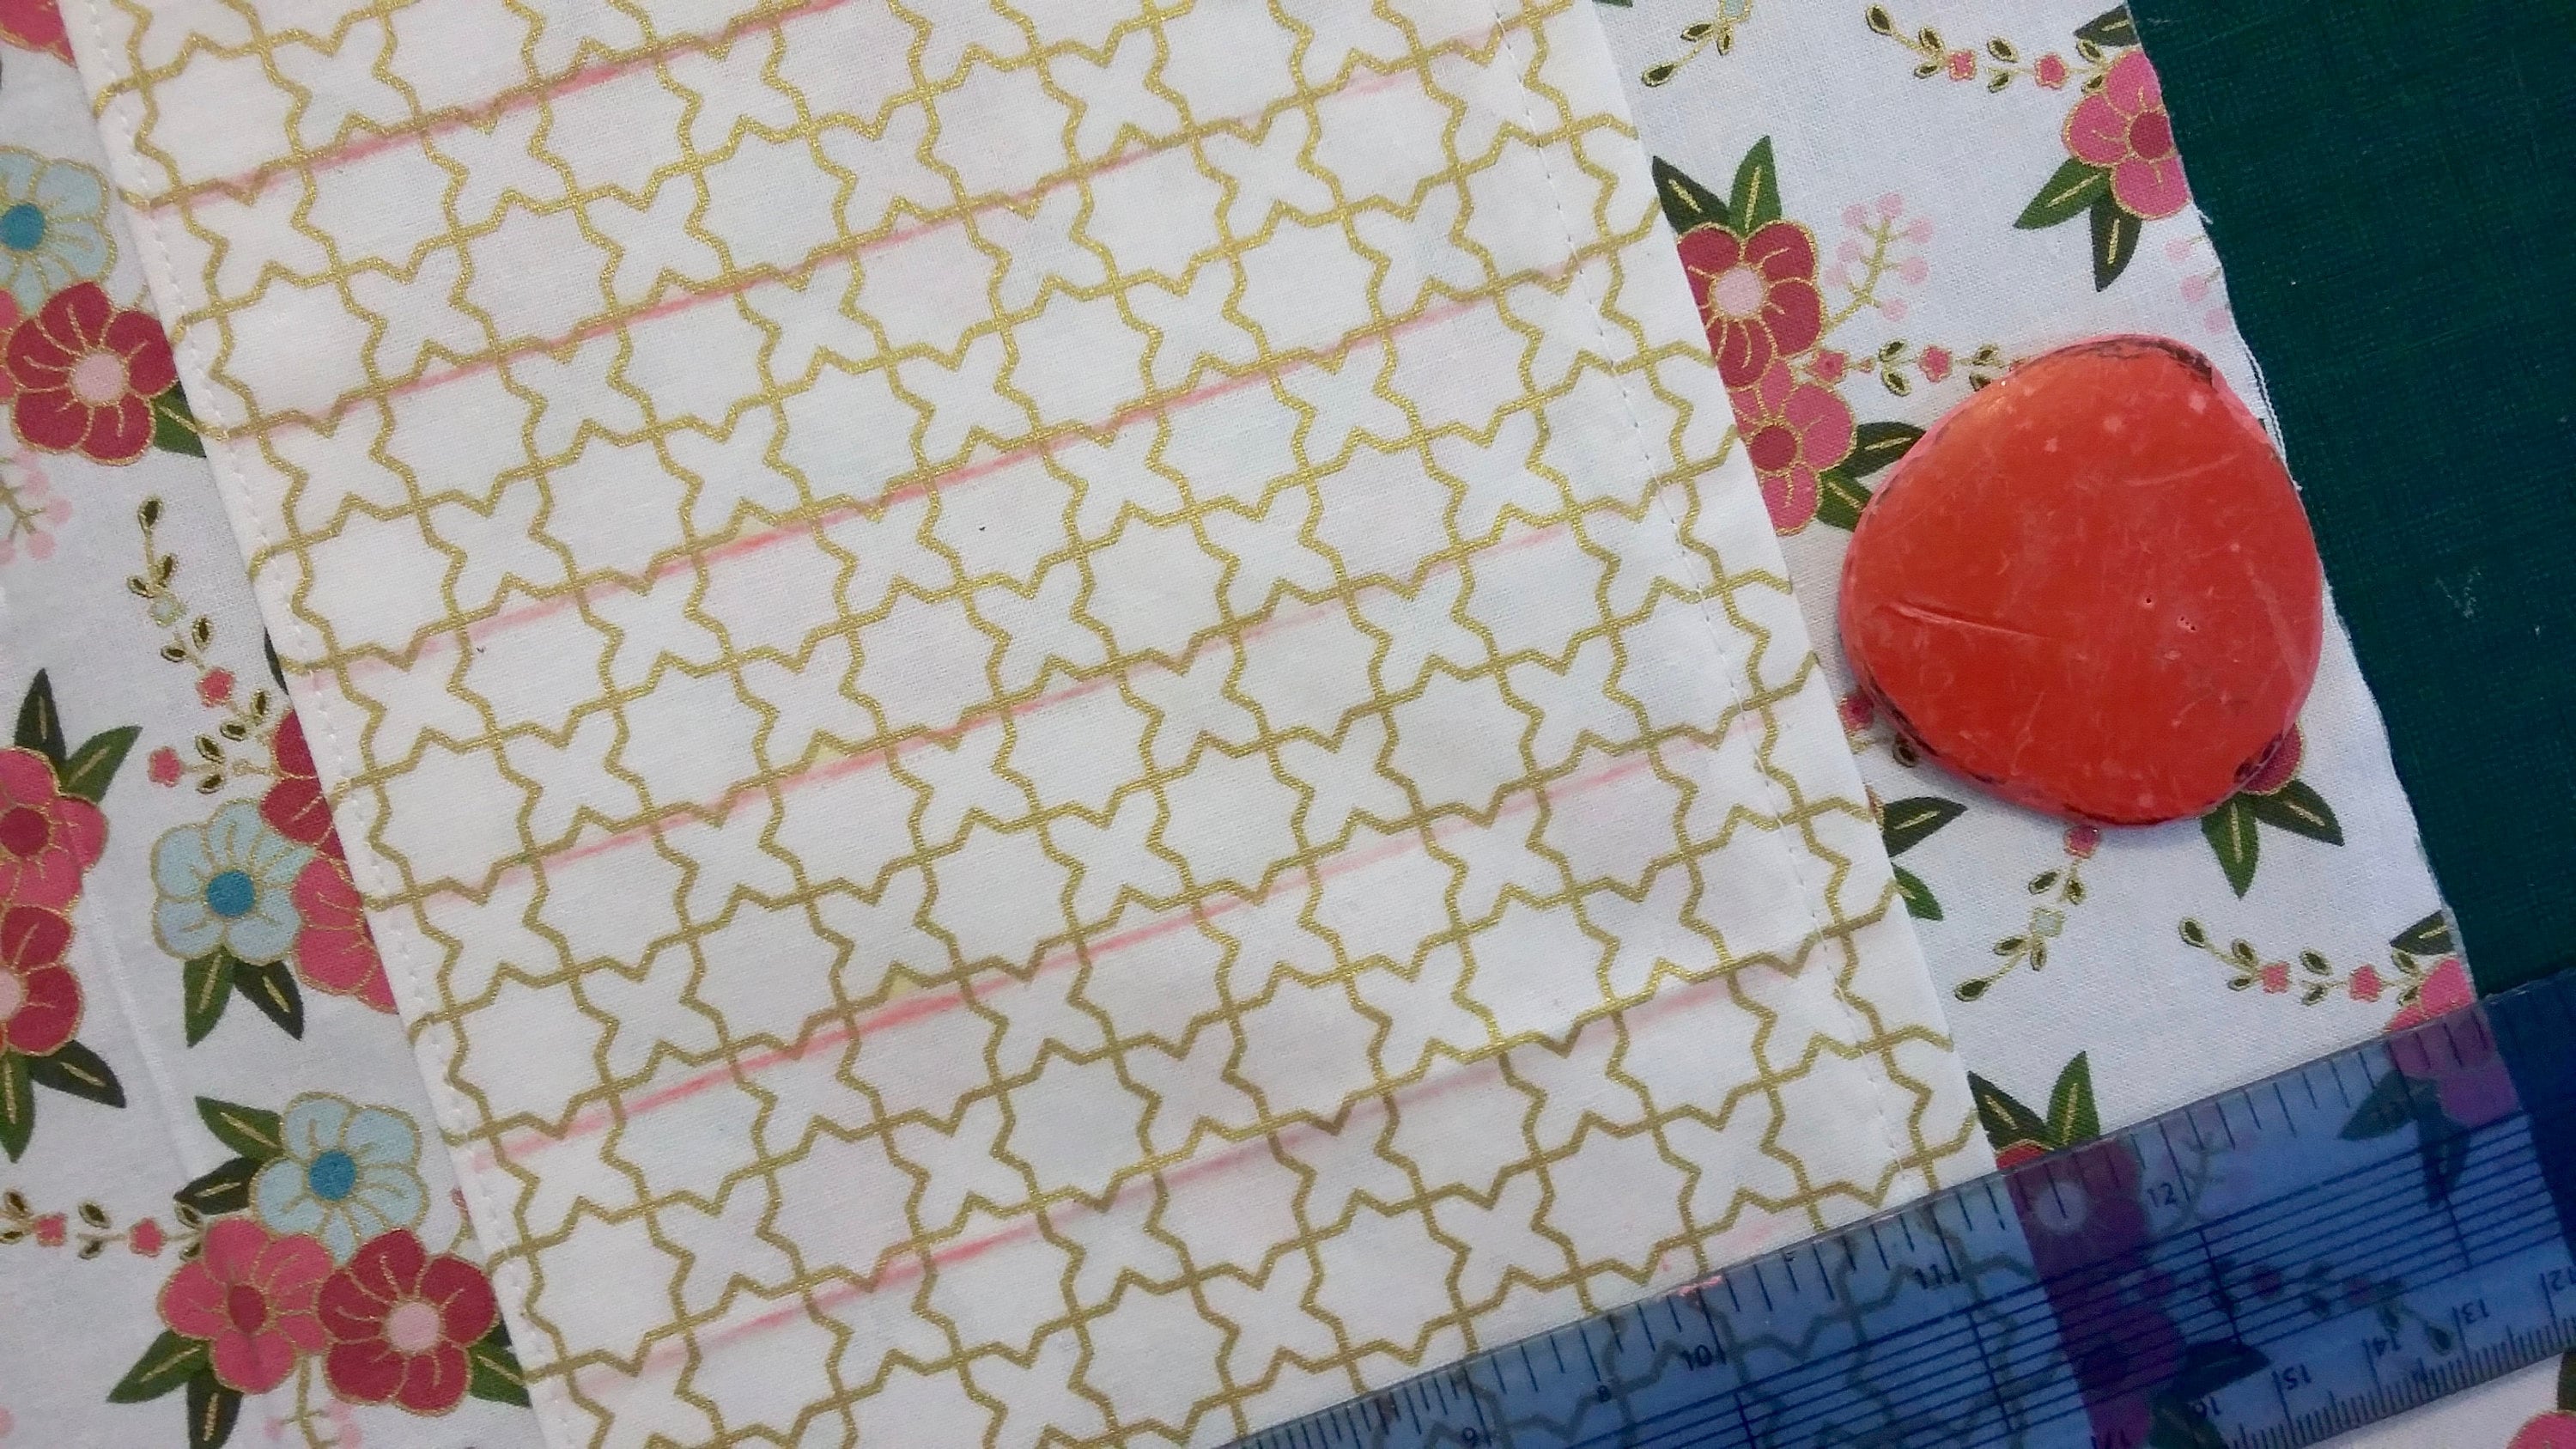
Fold the lining piece 18inch x 13inch in half right sides together matching up the shorter edges and press to make a centre crease. Position the pen pocket piece on the right hand side of the lining piece 1inch in from the centre fold, with the topstitched edge on the right and pin in place. Starting from the bottom edge, sew along the two short sides and the long bottom edge.To make the 12 pen pockets, using tailors chalk and a ruler, mark a 1/2inch line in from both short edges. From the first line mark 11 x 1inch lines.I find it easier and neater to sew the pockets from the base to the top. Turn the fabric around so that the pen pocket opening is pointing towards you. Starting from the base of the pocket piece, sew along the lines making sure you backstitch at the start and finish of each narrow pen pocket to secure. Test a pen inside the first pocket to make sure it fits neatly. Trim all threads front and back.
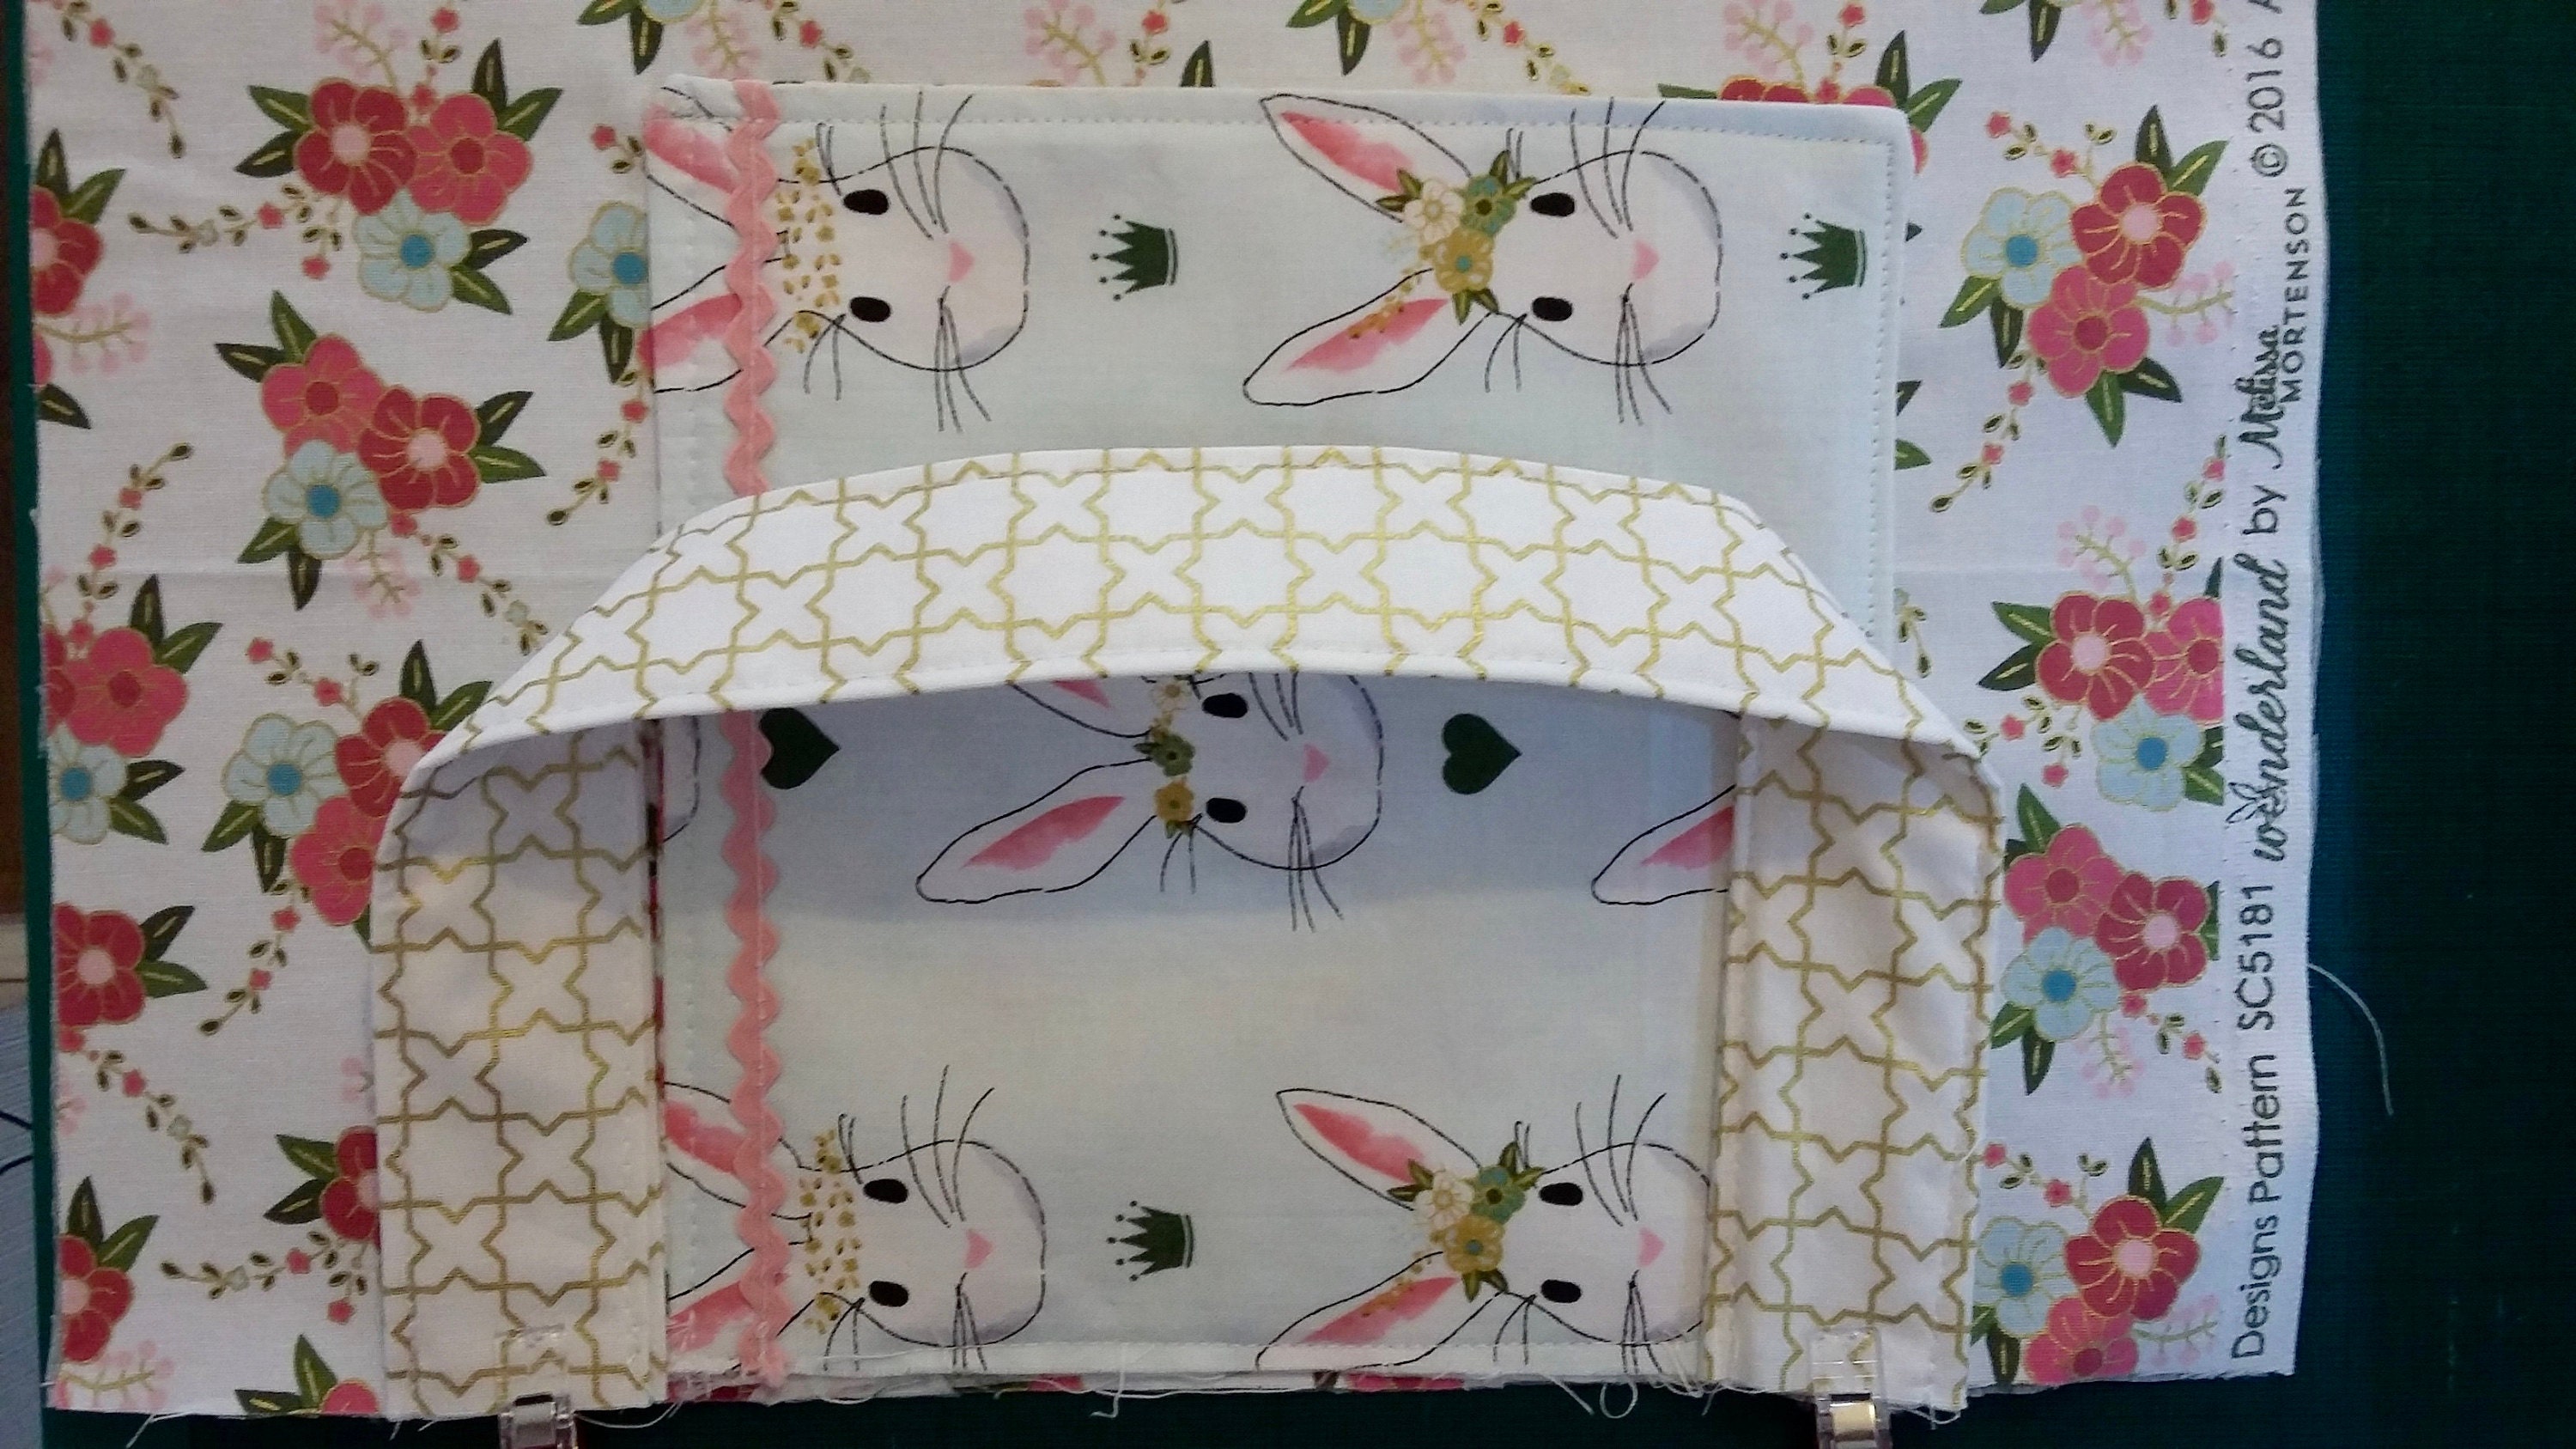
7. The pad pocket – On the opposite side of the lining rectangle, position the pad pocket 2.5inch up from the bottom edge and with raw edges matching. Starting from the right top edge of the pocket, sew along the three side edges to create your pocket making sure to backstitch a few times to secure stitching.
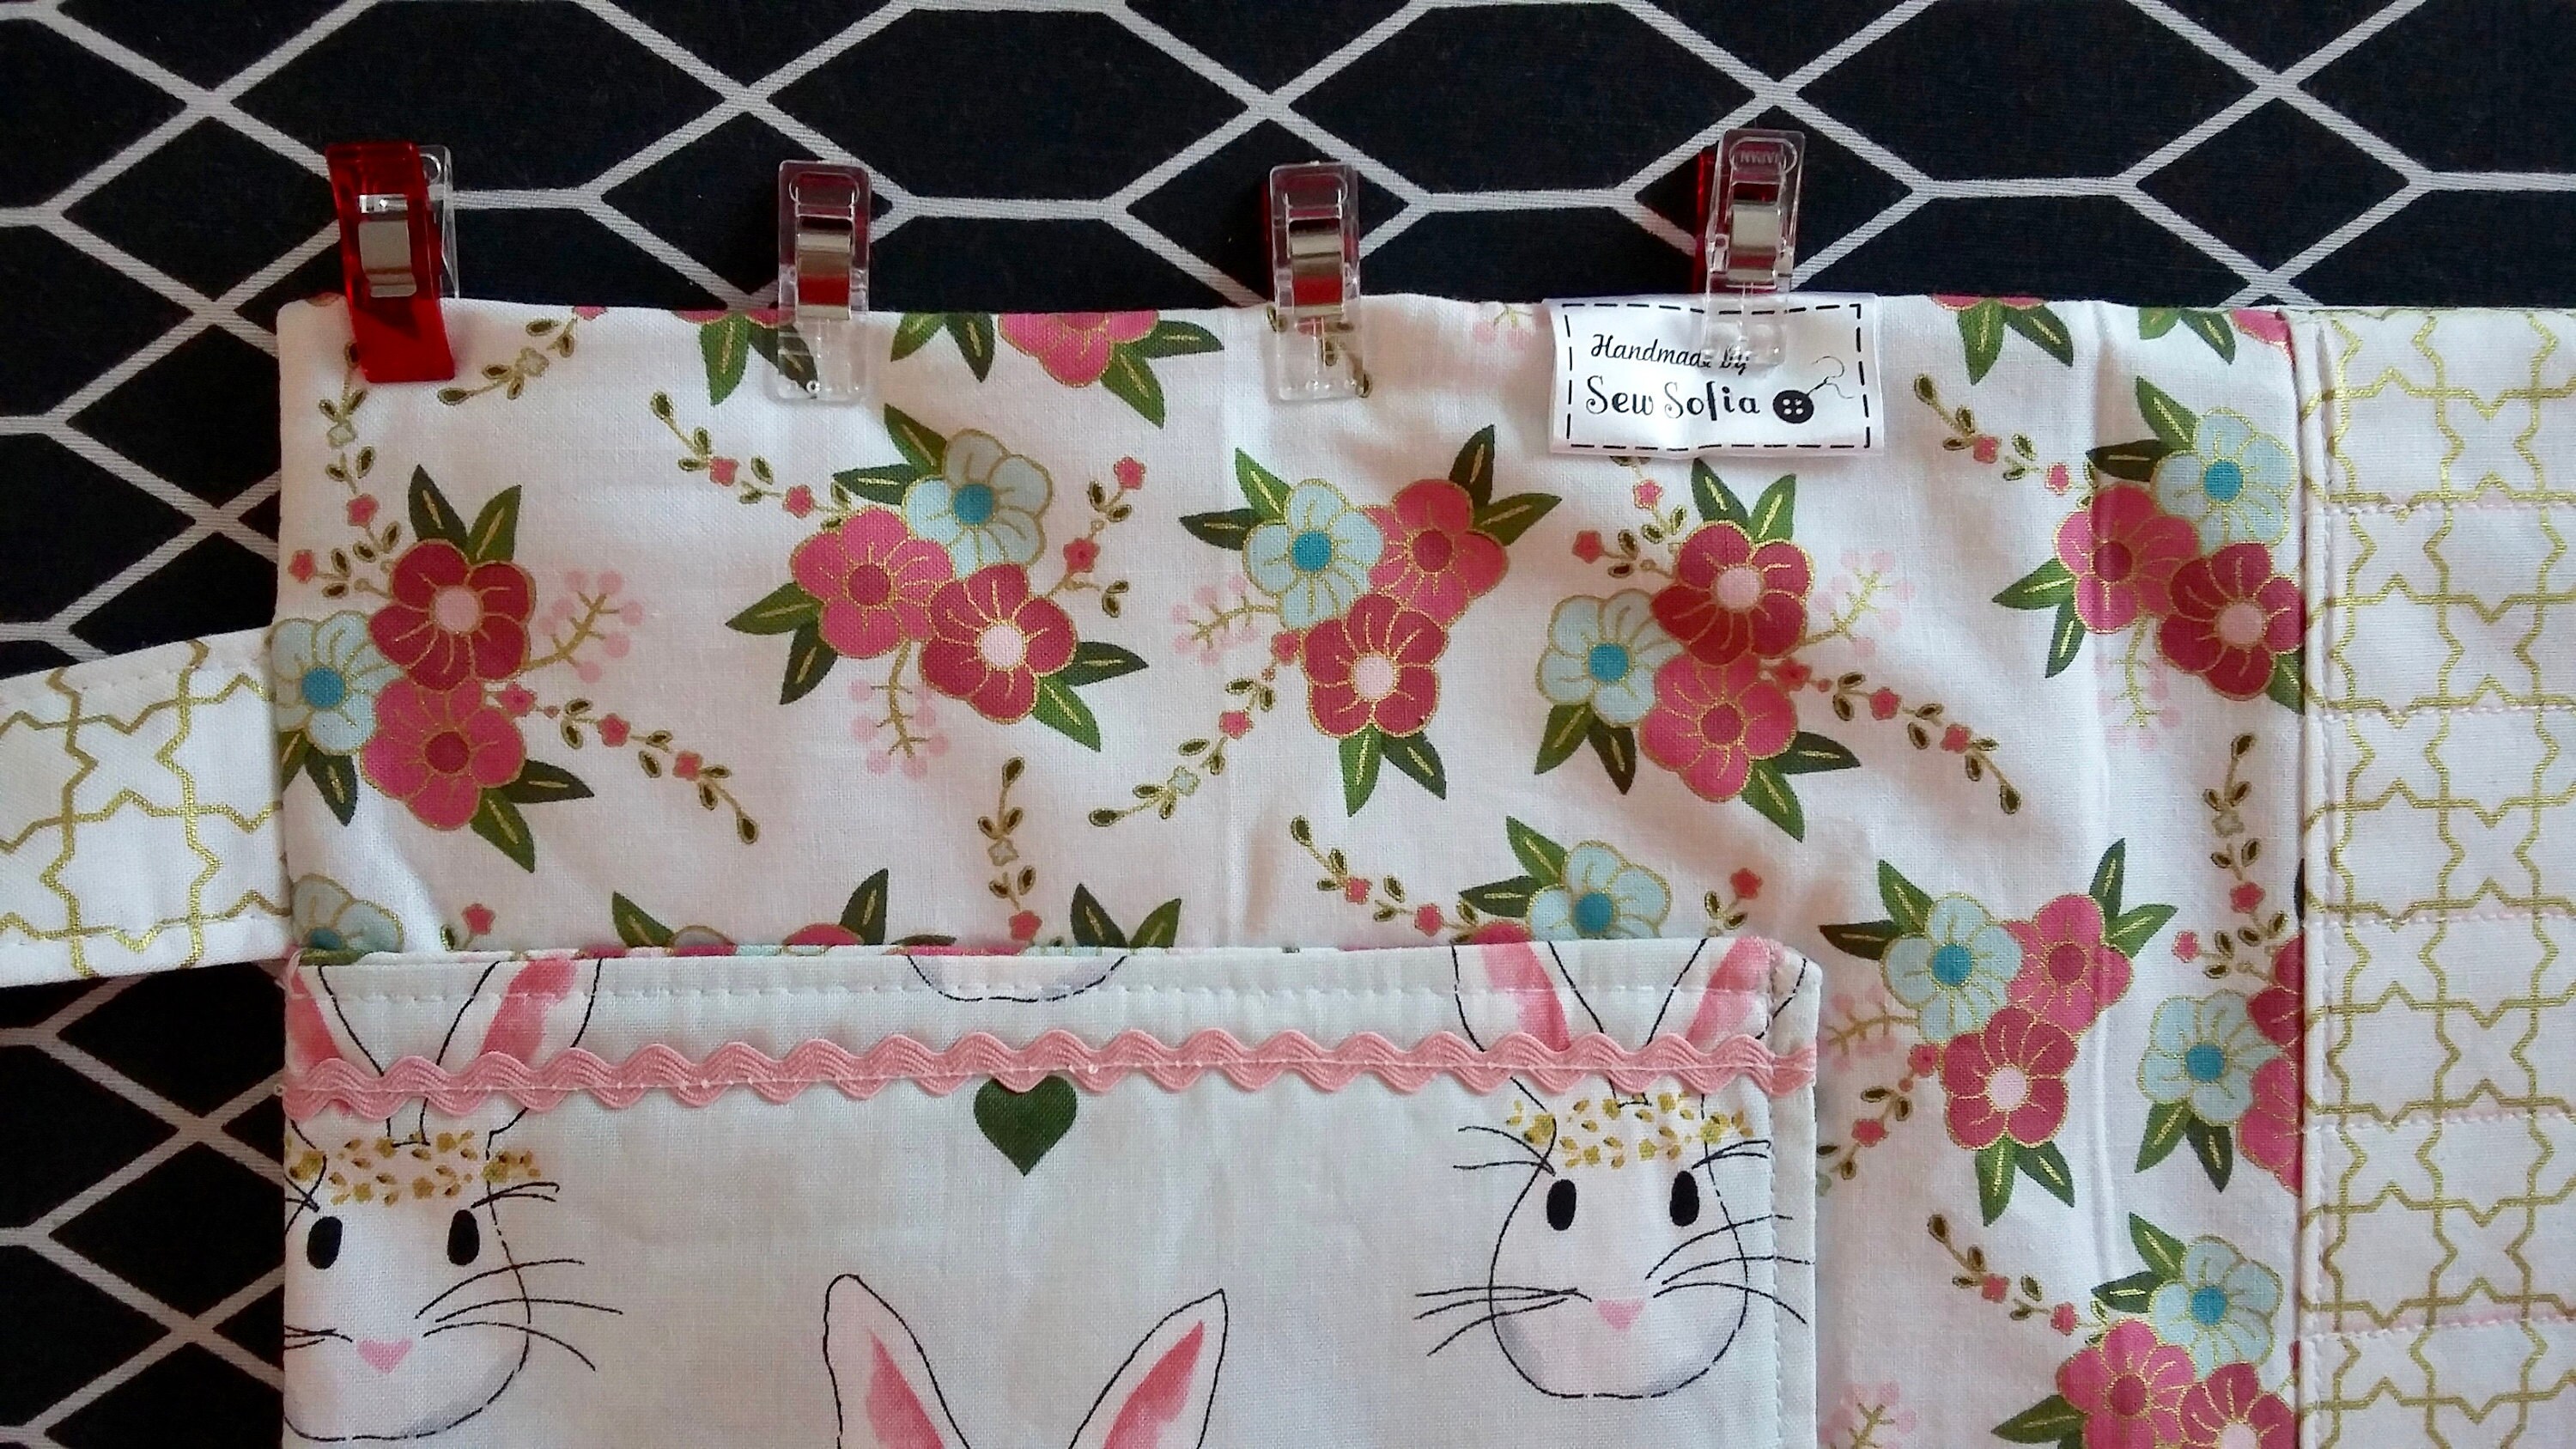
8. Attach flap and handles - centre the flap above the pen pockets, lining side down about 4.5inch from each side and pin or clip in place. Position a handle 1inch to either side of the flap with about 2inch on either side. Baste in place.
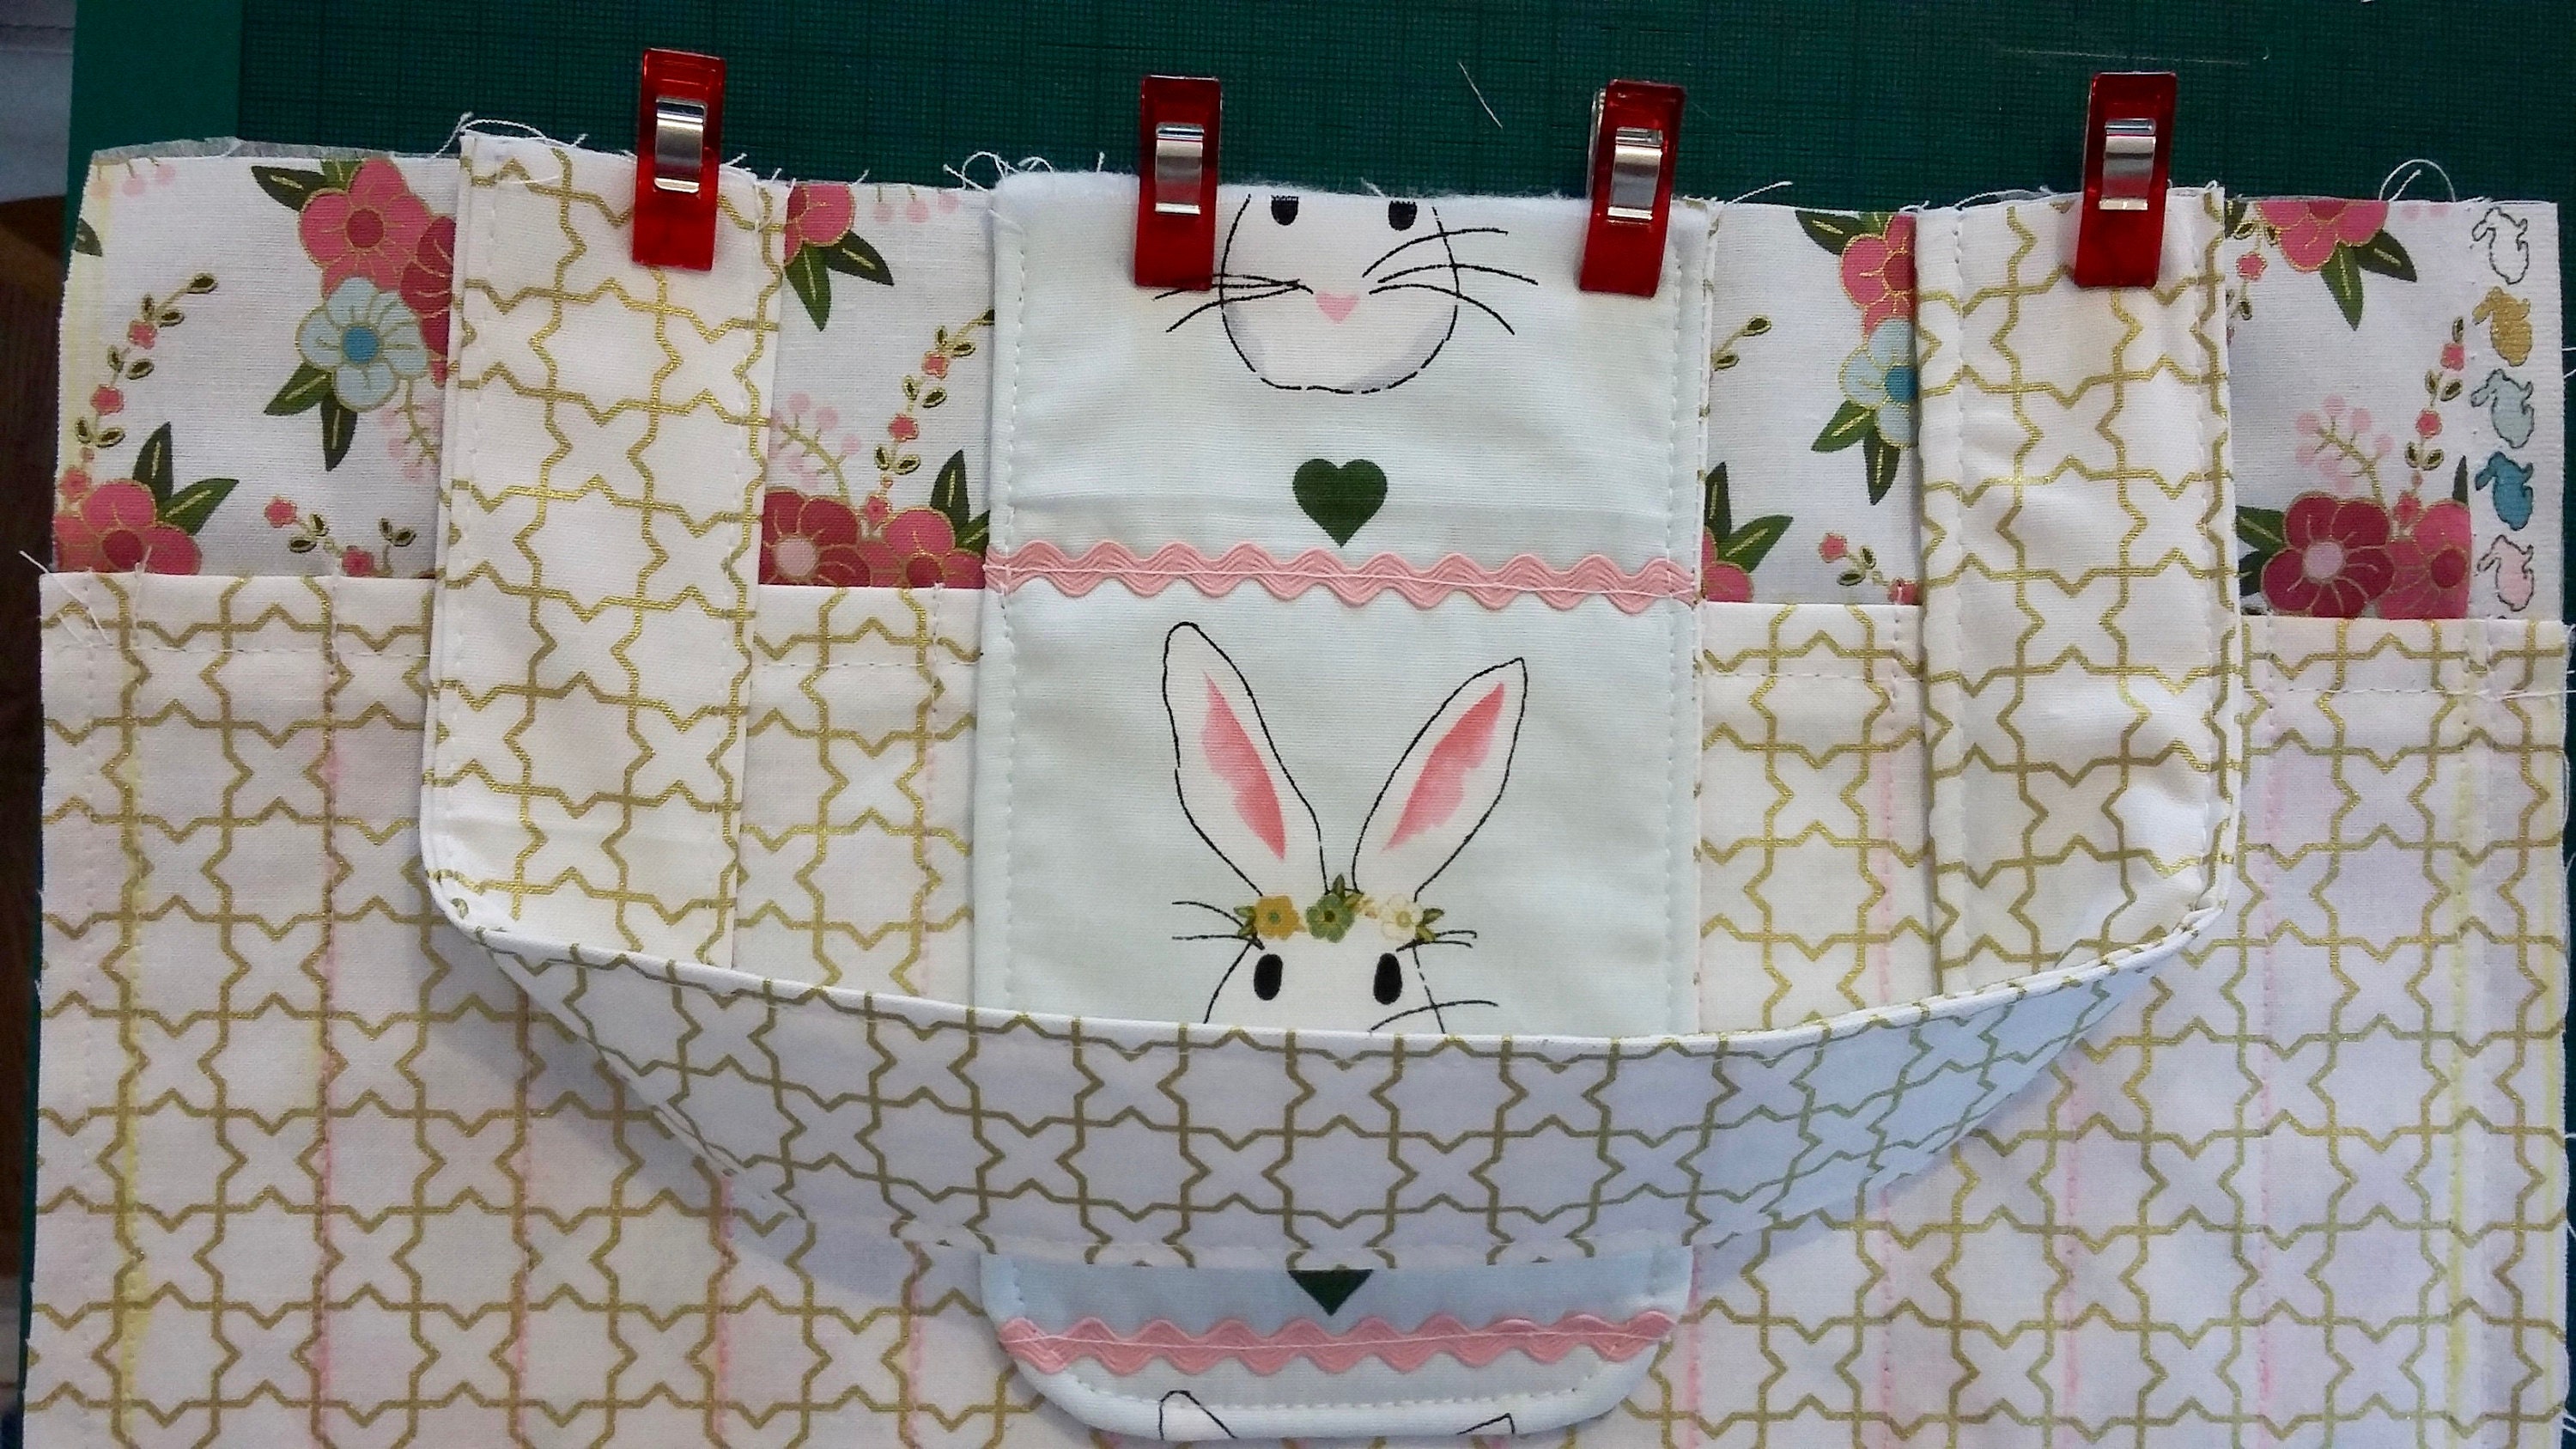
Position the other handle on the pad pocket side of the caddy 2inch in from either side and with raw edges matching. Fold the caddy to check that the handle mirrors the position of the other handle. Baste in place. The lining is done.
9. Final assembly: first you need to mark where the other Velcro tab will go. Place the outer fabric right side down, then the wadding, then the lining on top. Carefully fold the art caddy to close and place the flap over the outer fabric and mark in chalk where the other Velcro tab will go. It should be about 4-4.5inch in from the centre of the caddy and just depends on how thick your wadding is. Taking the outer piece only, sew on the Velcro, remembering to backstitch to secure in place.
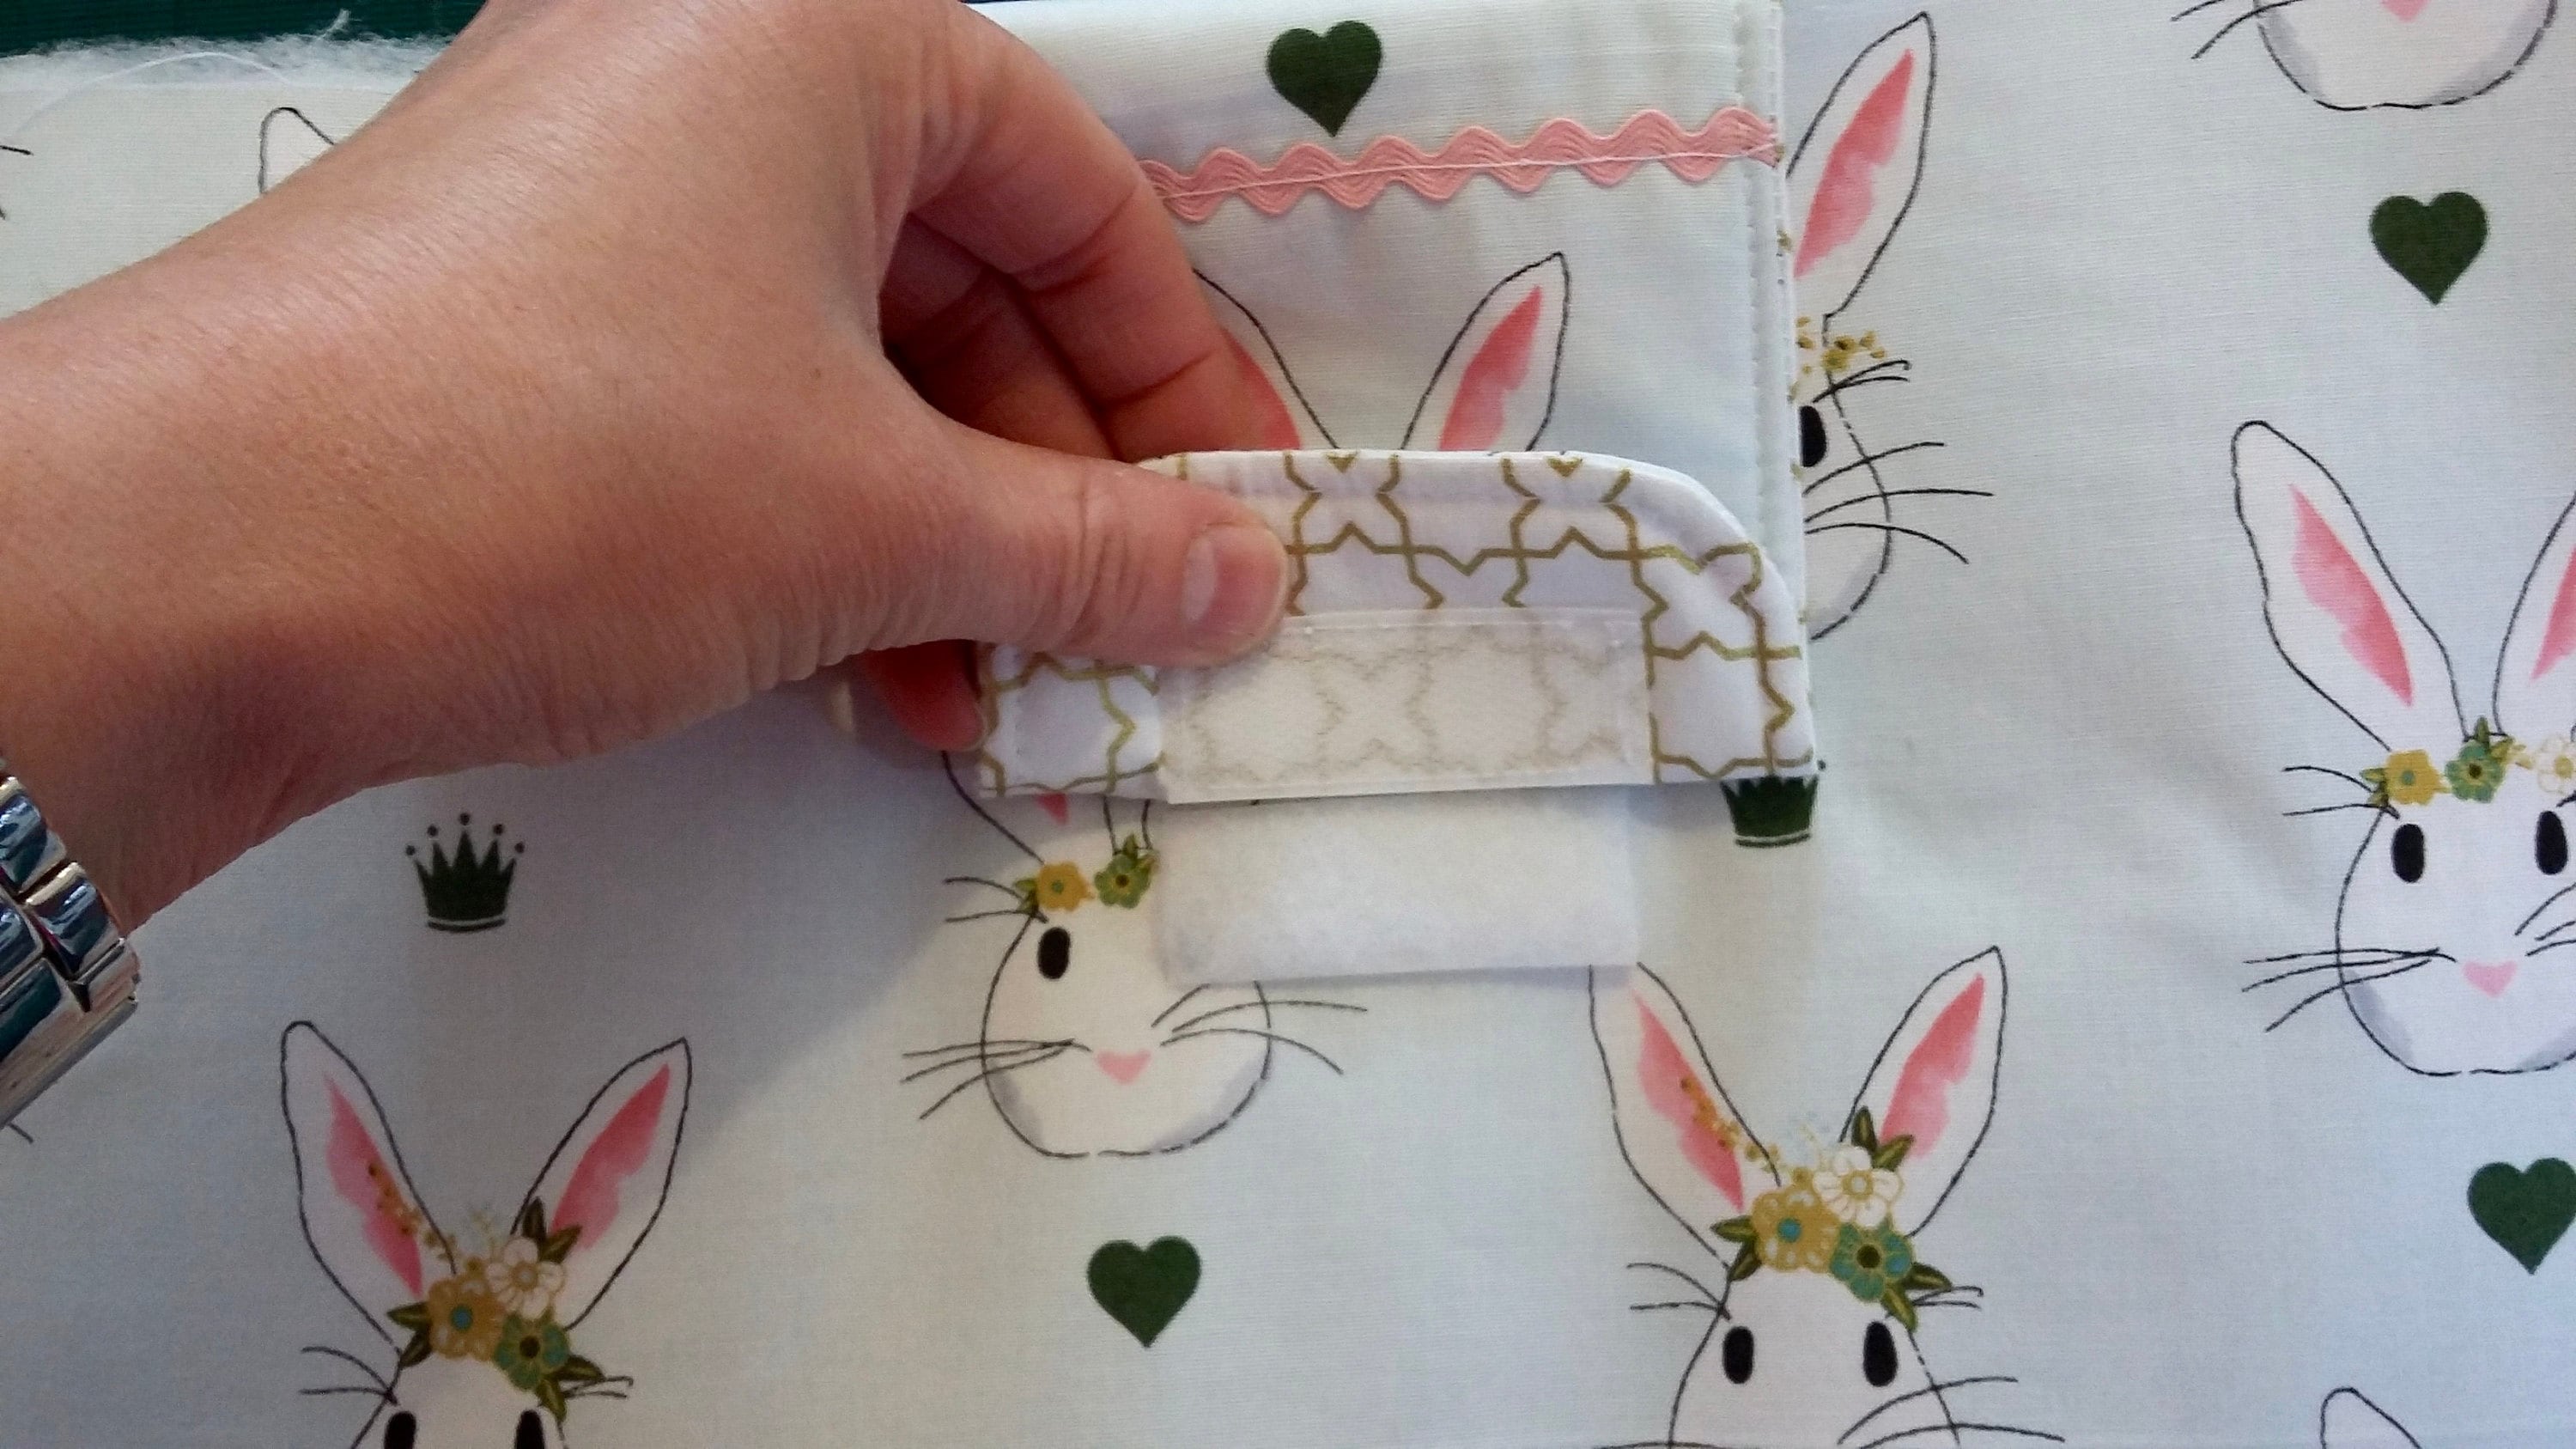
Now for the final sandwich! Place the art caddy lining side up with pad pocket on the left, pen pockets and flap on the right. The flap and handles need to be lying flat inside of the rectangle and could be pinned out of the way. Place the outer fabric right side down on top of the lining making sure that the Velcro tab is on the opposite side to the flap. Place the wadding layer on top and clip all the way around the caddy (you can use pins too but make sure they are facing inwards as we will be sewing on the lining side of the caddy).Now flip the caddy over so that the pen pockets are on your left, the pad pocket is on your right and make sure that the lining is aligned with the outer fabric and laying perfectly flat. Starting at the top right corner, sew along the short side across the handles, pivot and sew along the long side, then down the other short side with handles and flap. Pivot and sew along the other long side leaving a 6inch gap to turn the caddy. Trim seam allowances and clip corners being careful not to cut into the stitches. Reach into the gap and pull the caddy inside out. Poke the corners out gently and give the caddy a good press making sure to stay clear of the Velcro with your iron! Fold under the open seam, press and pin/clip. Starting about 0.5inch in from the corner with the gap, topstitch all around your caddy taking your time as there are a few layers to get through.
You are done! Now all you need to do is fill it!